We are all aware of the selector control in Acumatica and its use. Standard fields can be easily added to the selector/lookup control through screens, but custom fields will not be displayed on the selector control by following the same process. We must perform some additional steps to make it visible on the selector and the below steps will help in achieving the same.
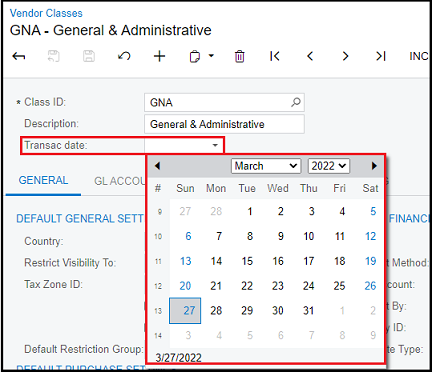
In this blog, we will consider a Vendor Classes screen where the custom field “Transaction Date” is already added, and we have to make it available on the Vendor selector when used from the Vendors screen. The attributes feature is available from Acumatica 2020R1.
We have already seen the steps to add a field to the selector/lookup of Acumatica in our previous blog. Once done, we will have a lot added in DAC as shown below with its default attributes
Modify the attributes of the field
To make the customized field visible on the selector control, change the attribute by adding the visibility properties to PXUIField.
[PXUIField (DisplayName=” Transac date”, Visibility=PXUIVisibility.SelectorVisible)]
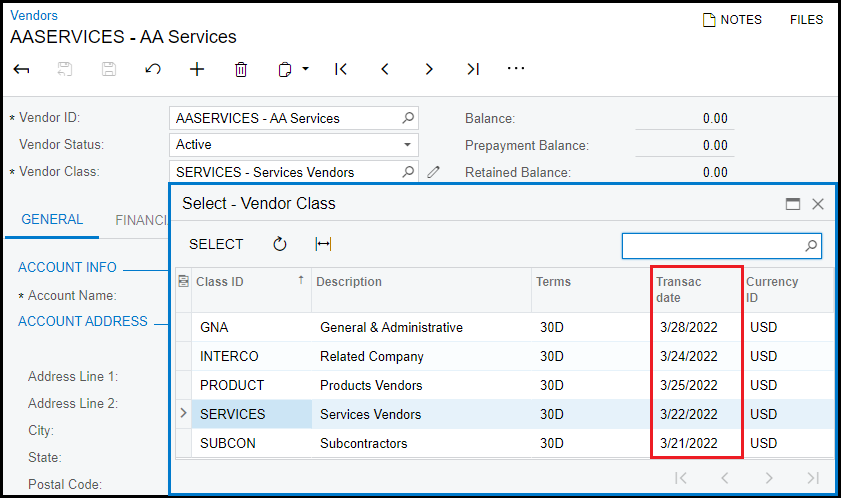
Once the attribute is modified; Save and publish the customization project. As we can see from the below screenshot, the “Transac date” field is added up on the selector control of the vendor class field on the Vendor screen.
So, the provision of adding the customized field in the selector makes it very helpful to view/sort the data based on day-to-day business processes. This, in turn, saves the user time by eliminating the unwanted process of navigating to the screen and reviewing the data that must be selected.


