Acumatica, a leading cloud-based ERP solution, empowers businesses to streamline their operations and make well-informed decisions. With its robust customization capabilities, Acumatica allows users to tailor the system according to their specific needs. An important aspect of customization is the ability to enable or disable features within the application. In this blog post, we will explore how to add a custom feature checkbox to the Enable/Disable Features screen in Acumatica.
The Enable/Disable Features screen in Acumatica gives administrators the control to manage the functionality and behavior of the system by enabling or disabling specific features. By default, Acumatica provides a wide range of features that cover various aspects of business operations, including finance, inventory management, sales, purchasing, and more. However, businesses often have unique requirements that may necessitate additional custom features.
To enhance the functionality of Acumatica and add custom feature checkboxes to the Enable/Disable Features screen, we need to follow a few steps:
Create a new customization project (refer to the blog below): https://www.greytrix.com/blogs/acumatica/2022/12/26/customization-approaches-in-acumatica/
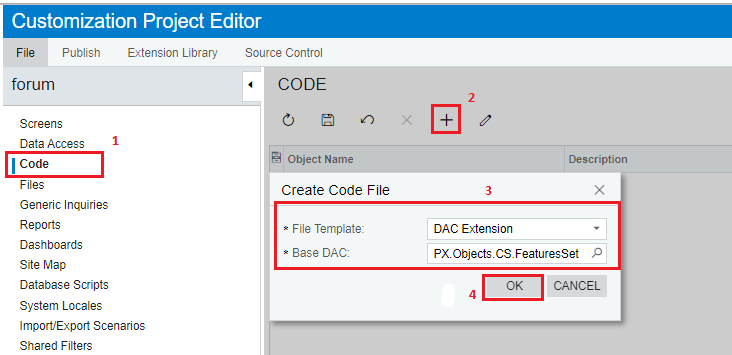
Access the customization editor and create a new customization field by extending the Features Set DAC. Follow the steps below:
- Go to the Code section.
- Click on the Add New Record (+) button.
- Select the file template as DAC Extension.
- Choose PX.Objects.CS.FeaturesSet as the Base DAC.
- Click OK to proceed

- Just replace the code snippet by following code or as per our requirement.

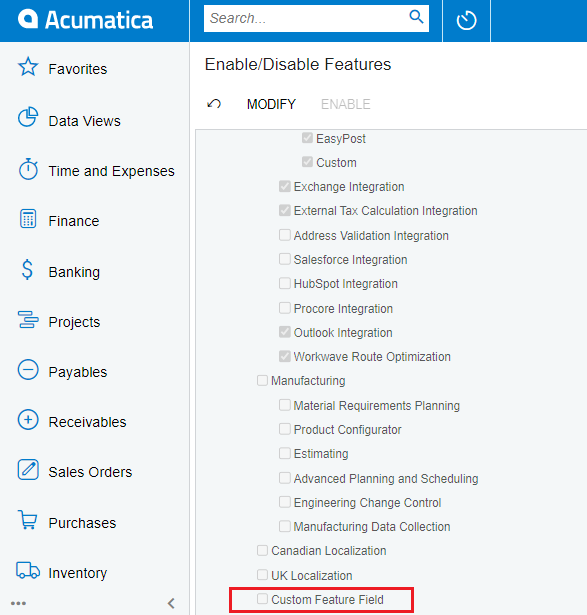
- Publish the Customization Project and Go to Enable/Disable Features (CS100000) screen.
Here we can see the new Custom Feature Field is added on the screen.

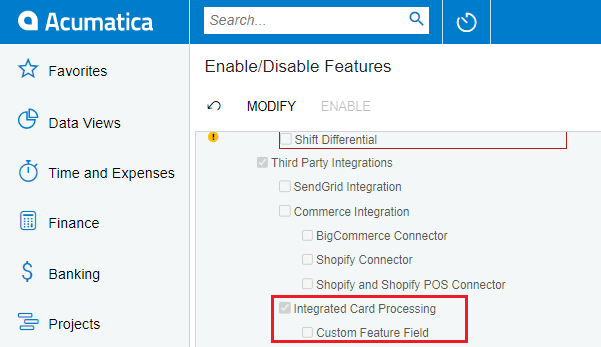
- If we want to Display the custom feature in another module. We can use below Code snippet. Just replace the second parameter of Feature attribute from null to typeof(FeaturesSet.Modulename) as below.(i.e. integratedCardProcessing).we need to specify the Feature DAC with the required Parent module.

And Here is the result.

Once we’ve added the custom checkboxes, we need to implement the logic to handle the enable/disable functionality based on the checkbox values.
1) Write event handlers to capture changes in the custom feature checkboxes. These event handlers will be responsible for updating the corresponding enable/disable settings for the custom features.
2) Update feature enable/disable settings: Within the event handlers, update the enable/disable settings for the custom features based on the checkbox values. This may involve modifying database records or invoking relevant Acumatica API.
This customization is compatible with the trial version license of Acumatica. However, to use it with a licensed version of Acumatica, it is necessary to inform Acumatica about the addition of this module or integration. Acumatica will then include the custom feature as part of the official license, allowing users who purchase this module to access and benefit from the added functionality.
