In our previous blog, we discussed about “Use Reverse Charge Mechanism for Service Tax in Sage 300 ERP”. However, before starting to use Reverse Charge Mechanism, user has to configure the process in Sage 300 ERP (formerly Sage Accpac ERP).
In this blog, we would discuss and will help users to understand the process to Configure Reverse Charge Mechanism in Sage 300 ERP. This Mechanism is handled in Sage 300 ERP by designing the following process flow;
1. In subsequent steps, we have to consider that the services created as non-stock items and are booked through Purchase Order Invoice Entry.
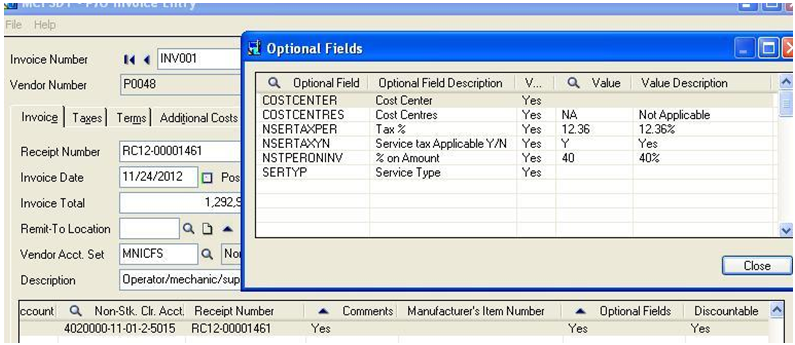
2. Here, we would define the following optional fields and then link them to PO Invoice detail lines or AP Invoice detail lines from where we book the Payable Invoices.
a. Service tax applicable: Specify whether service tax is applicable for this detail line or not.
b. Service Type: This field will contain the list of services that are part of new rule. Out of this, user has to select appropriate service. Say, here we will select ‘Supply of Man Power’ for any purpose; according to this service type, service provider has to pay 12.36% of tax on 25% of Invoice amount, while the service receiver has to pay 12.36% of tax on 75% of Invoice amount.
c. Percentage on Amount: What percentage or Amount is applicable for the service receiver shall be defined in this optional field. Thus, according to the above example for ‘Supply of Man Power’, service receiver has to pay tax on 75% of the invoice amount and service provider has to pay tax on 25% of the invoice amount. Therefore, in this optional field we have to select 75% as the value.
d. Tax Percentage: Here we have to define the tax percentage that is used to calculate the tax on 75% of invoice amount for service receiver.
Also Read: Tax Deducted at Source for Sage 300 ERP
3. Ones these optional fields are defined; it is time to use them at the PO or AP detail level.
4. Below screen shows, the PO Invoice entry along with the optional fields linked to it.
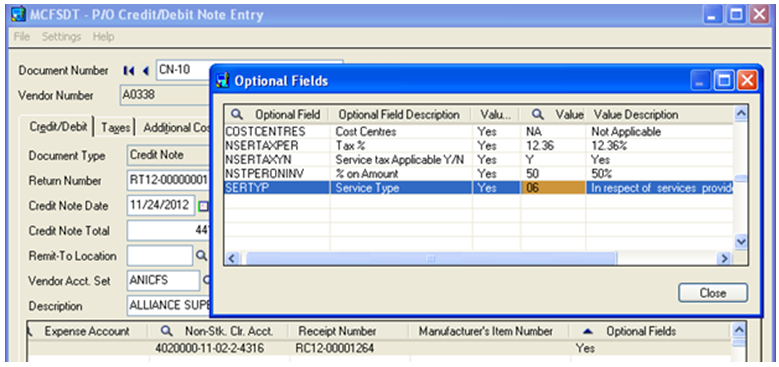
5. Similarly, there may be a case where we will be using the same concept for credit and debit notes.
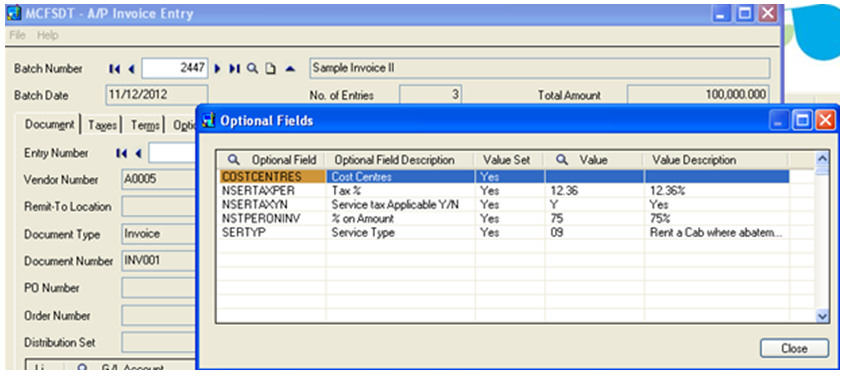
6. Same would be applicable for Accounts Payable module, when we are not booking any invoices through the operational modules.
7. After selecting optional fields and posting transactions, values of optional field will flow from sub ledgers to GL, where we can select appropriate GL and then can extract reports to serve our purpose.
8. All these optional fields are now been linked to expense GL account, which is used according to the services we have received. Now, whenever we extract the dump of that particular GL, we can get services details that we have received along with percentage, which we selected at the time of booking documents in form of optional fields.
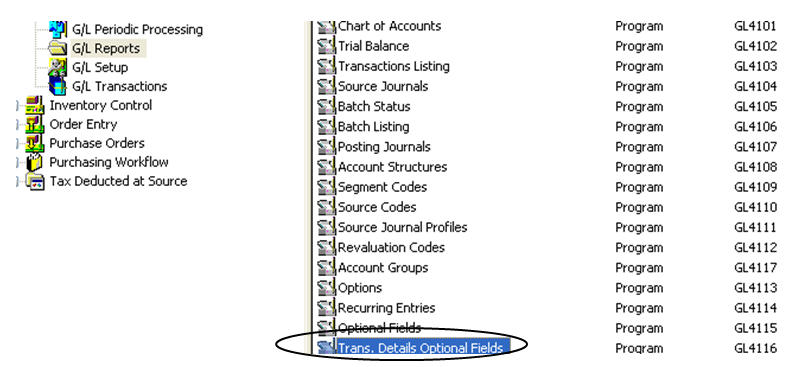
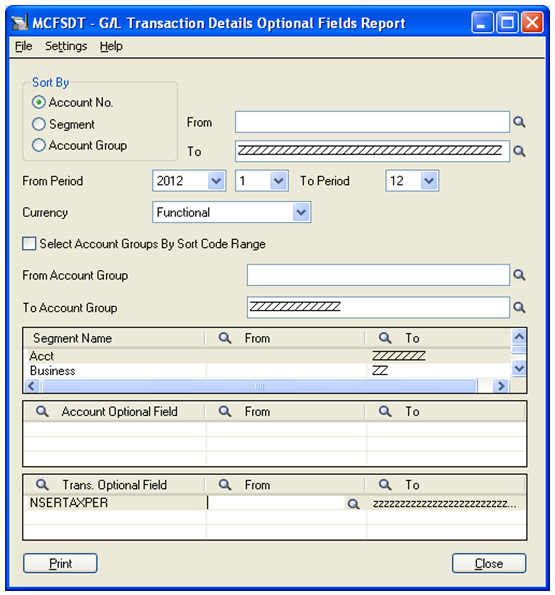
9. To run reports navigate to General Ledger >> G/L Report >> Trans. Details Optional Fields.
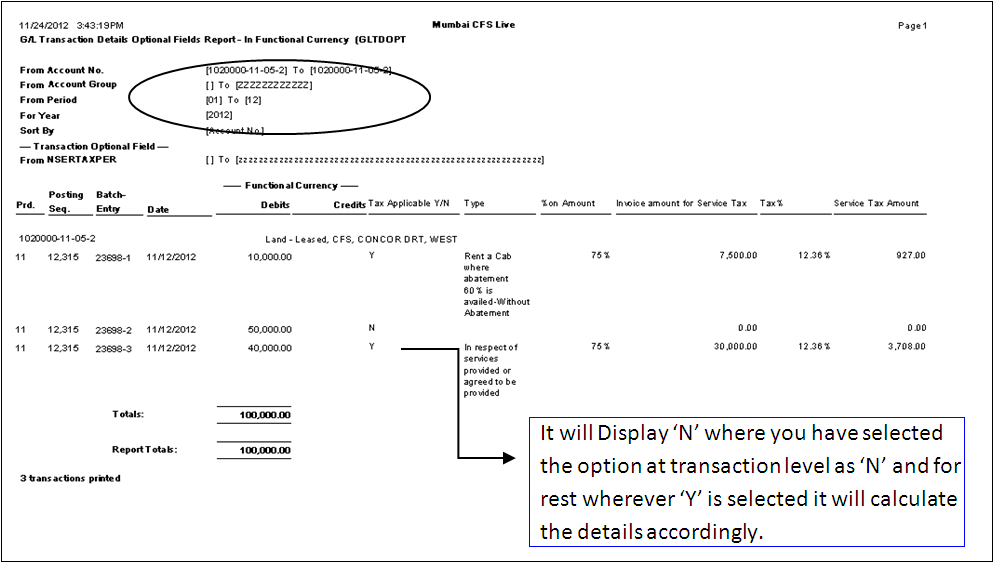
10. Consider a scenario; In GL 1020000-11-05-02 was been used at the AP level to book an invoice and then all the optional field were selected accordingly.
11. In the User interface, we have to select GL and then there is filter for selecting the Trans. Optional fields. This will give us the list of optional fields that we have used at the transaction level.
12. Now suppose, we have received two types of services using the above said GL then we can get the details of each individual service by selecting it individually in the optional field filter.
13. Just below the user interface, we can find the GL dump of the above said GL, which will give us details of services, booked using that particular GL account.
14. Report can be customized depending on the requirements and can be made more informative.
Hence, by extracting reports we can pass an appropriate journal entry transferring the appropriate balance from the above said account to the service tax account and can then make the service tax payment. Thus if any information regarding the services is required we can extract the above said GL which will provide the services details along with the percentage applicable.

