Last week I faced this quite strange issue on one of the client’s server. Looking at the error I thought it is due to an improper deployment of VFS. I again deployed the same on the server but no luck.
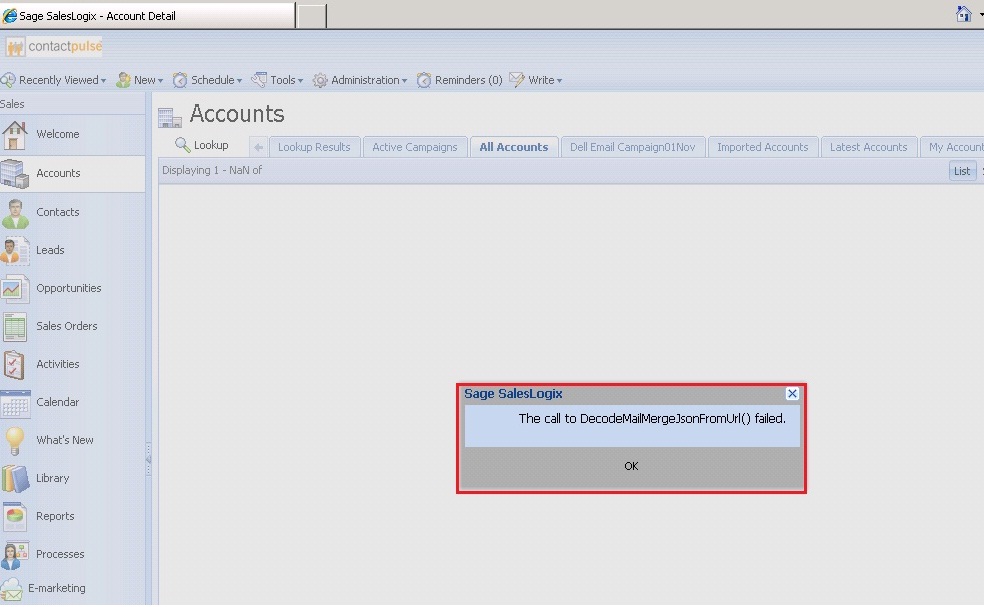
Just to give you a bit background of an issue; I installed the Sage SalesLogix LAN and Web Client on the server. Installation went smoothly. SLX LAN was working as expected. However when I tried to run SLX Web client I got an error on navigating each of the entities listed in the Navigation Panel as well as on click of OK button, screen sometimes crashed with below error. Here is how an issue was occurring.

Looking at the error, I thought it is an issue with Mail Merge option available in the SLX. I observed that Mail Merge features (letters, e-mails, templates) are accessible using the Write option available at the top navigation. Without Desktop Integration, the Write menu is hidden from view. I tried reinstalling Desktop Integration but error message was still coming up.
After some more investigation, I found that this function is called from sage-mailmerge-loader.js file which is at the below location.
C:\inetpub\wwwroot\SlxClient\jscript\sage-mailmerge\sage-mailmerge-loader.js
Then found the below mentioned post related to this topic on SLX community forums.
http://community.sagesaleslogix.com/t5/Sage-SalesLogix-Developer/The-call-to-DecodeMailMergeJsonFromUrl-failed/m-p/14355/highlight/true#M3630
Tried both the suggestions given in the post, but no success.
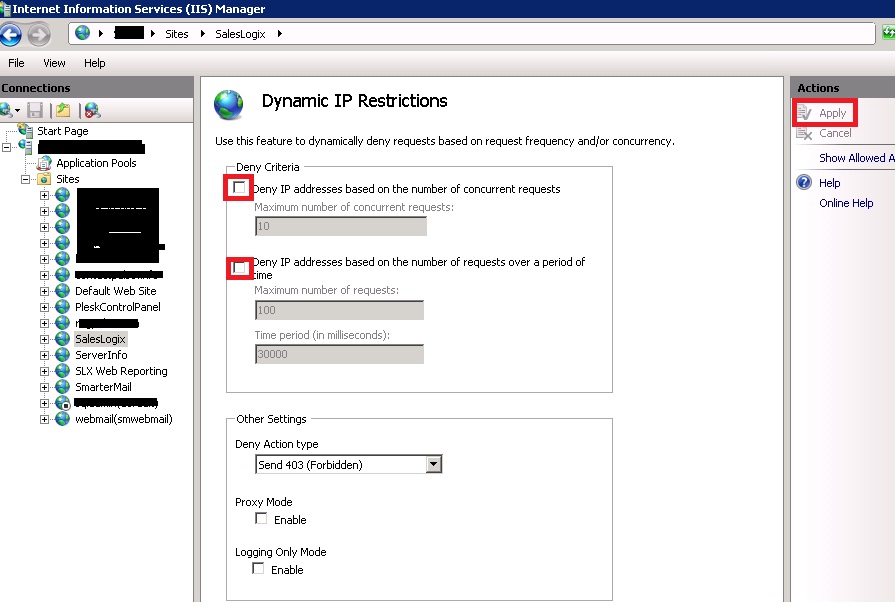
After escalating an issue to sage local support decided to give it one more try with IIS settings. Found that the dynamic IP restrictions were in place, don’t know how. Hence followed below steps to remove deny criteria.
- Go to Start and run the inetmgr command.
- Internet Information Services (IIS) Manager will get opened.
- Expand Sites and Select the SalesLogix web site.
- Here you will see the Dynamic IP Restrictions settings in the IIS section.
- Click on it and clear both the checkboxes shown in the below screen shot.
- Then click on Apply button which is available in the right side panel to apply the settings.

