


We are glad to inform that Greytrix has released ‘GUMU™ Sage CRM – Sage Intacct Integration’. We at Greytrix are focused to help the client in successfully implementing the new Sage Intacct ERP system through our various successful migration and integration solutions. In this blog, we are discussing ‘How to create a Vendor in Sage Intacct’ with the help of appropriate steps and respective screenshots.
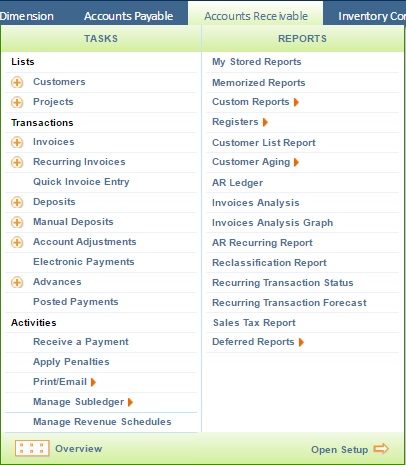
Let’s get started, first go to Accounts Payables -> Vendors -> Click on (+) to create a Vendor (See below screenshot)
Once you click on Vendor (+), it redirects to vendor information form as shown below.
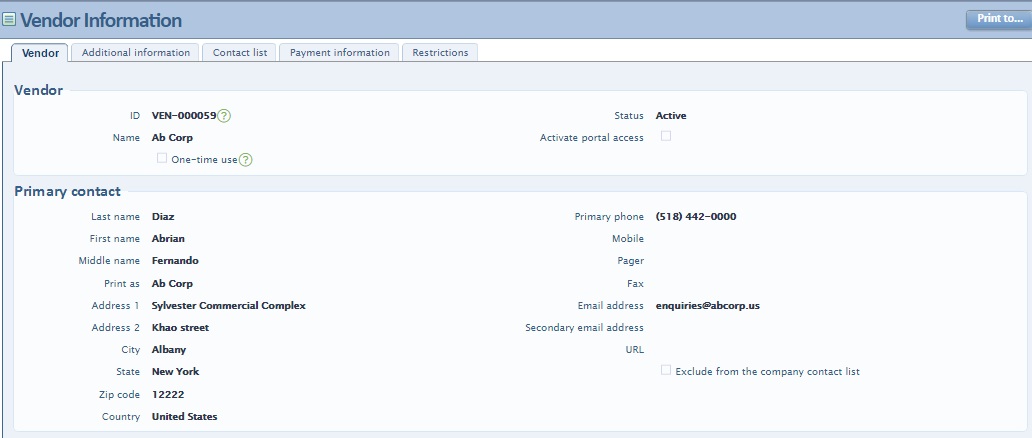
After you fill the above vendor information form, click on save. This is how a vendor is created in Sage Intacct. Later on, these vendors can be used for Purchase Transactions.
Let’s elaborate few major fields from the Vendor information screen:
- ID: This ID field gets auto-generated when we create a new vendor and this can’t be edited after creation.
- Name The name of the vendor, which is usually the company name.
- Status: This field contains the Vendor status i.e. whether it is an active or inactive vendor.
- Primary contact: This field contains the primary contacts basic information such as Contact’s name, address, Mobile/Fax, Email ID etc.
In our next blog, we would discuss Vendor’s additional information.