In Sage Intacct, we have introduced a new Application for Tax Deducted at Source (TDS), designed to streamline TDS transactions with minimum clicks. Based on Indian taxation rules, this application simplifies the TDS process for users. In our previous blog, we explored the features and functionalities of Sage Intacct TDS in depth, providing a thorough understanding. The application automates tax deduction calculations across various sections and slabs, ensuring accurate, detailed, and efficient reporting.
New Stuff: – Goods and Service Tax (GST) for Sage Intacct
First, let’s understand the configuration process of TDS in Sage Intacct.
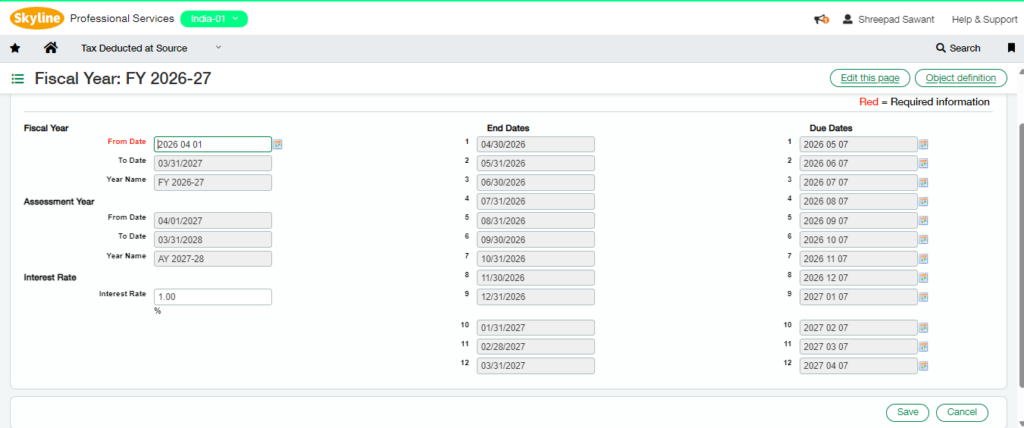
1. Fiscal Year: – Navigate to Tax Deducted at Source –> Fiscal Year
The Fiscal Year UI is used to configure the TDS Fiscal/Financial Year. Within this interface, the due dates for each month in the selected Fiscal Year are automatically set to the 7th day of the following month. If any due dates have passed, the Interest Rate field is used to apply interest on the outstanding TDS amount.
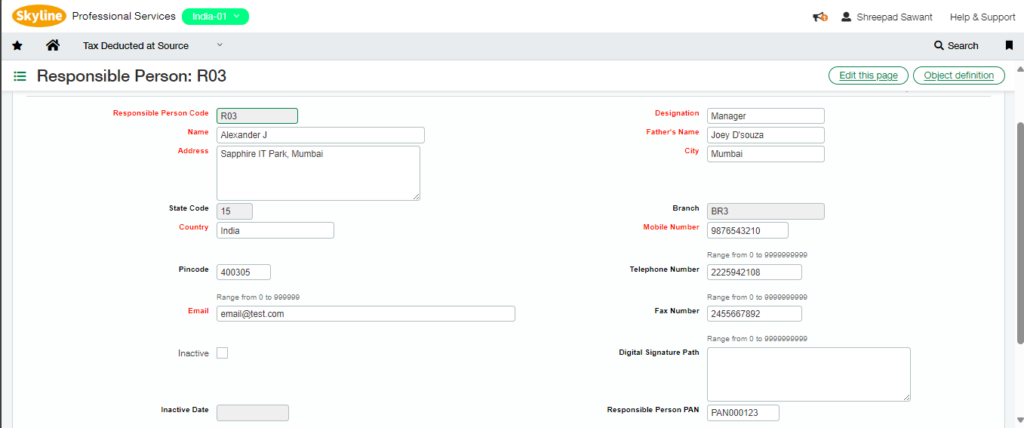
2. Responsible Person: – The Responsible Person UI allows users to assign a Responsible Person to a specific branch. Additionally, users can set the status of the Responsible Person to Active or Inactive by using the Inactive checkbox.
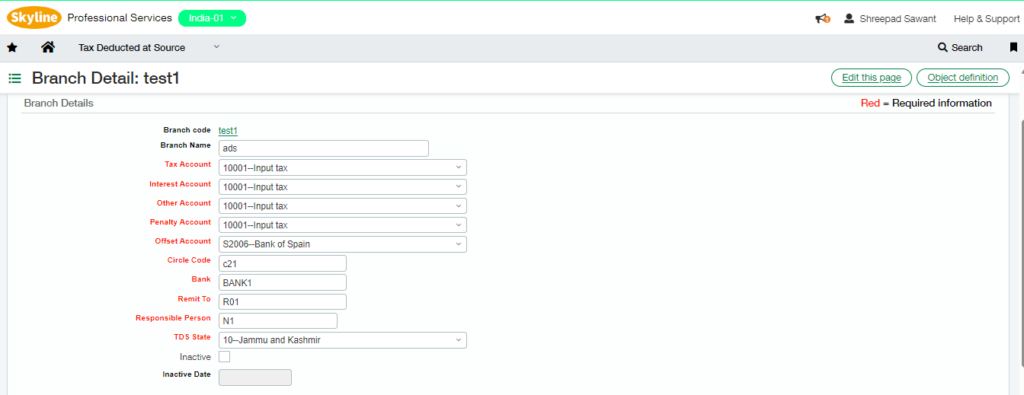
3. Branch Details: – The Branch Details UI is used to create branches and assign a unique Responsible Person to each one. A Responsible Person can only be assigned to a single branch and cannot be shared across multiple branches. Users can configure various accounts for each branch, including Tax Account, Interest Account, Other Account, Penalty Account, and Offset Account. Additionally, users can set the branch’s status to Active or Inactive by using the Inactive checkbox.
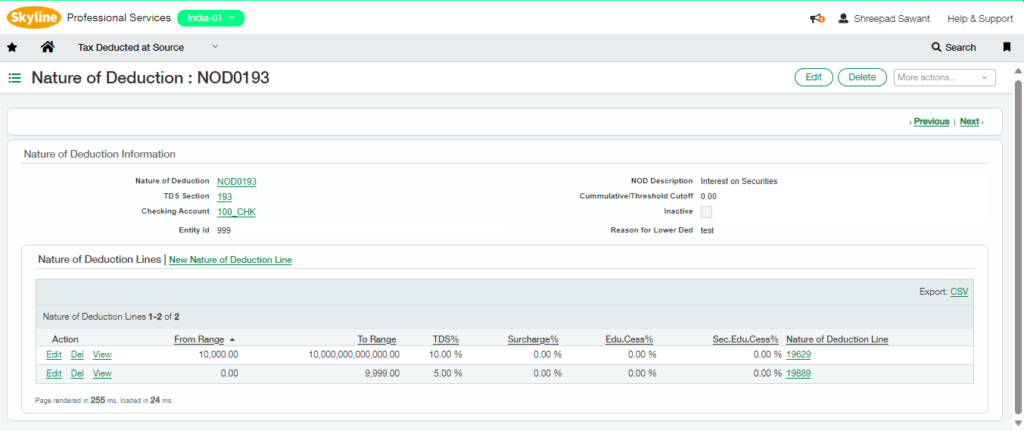
4. Nature of Deduction: – The Nature of Deduction (NOD) is used to define the types of deductions and their corresponding rates. Different sections can be applied to the NOD as required. For cumulative or threshold limits, users can specify the values in the Cumulative/Threshold Cutoff field. These NODs are then available for selection in the Party Details UI. Additionally, users can set the NOD status to Active or Inactive by using the Inactive checkbox.
5. TDS Party Details: – The TDS Party Details UI is used to assign the Nature of Deduction (NOD) and Branch Details to a specific vendor for whom TDS needs to be deducted. Users can also define the Vendor Type and enter PAN details for the vendor. Additionally, the Resident/Non-Resident status can be set for these vendors.
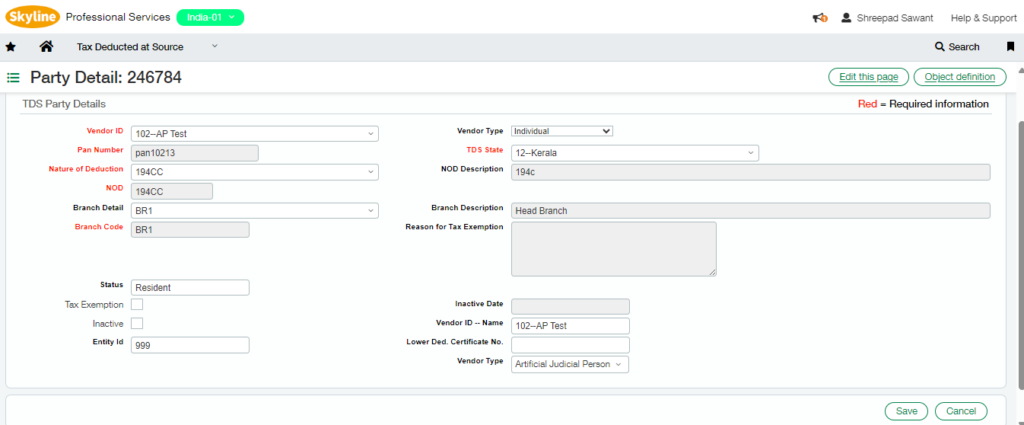
6. TDS Options: – The TDS Options UI is used to enter the company’s default details, including its PAN and TAN numbers. Users must also select the Branch and State for the company. Additional information, such as the company’s status, telephone number, fax number, email, and more, can also be provided.
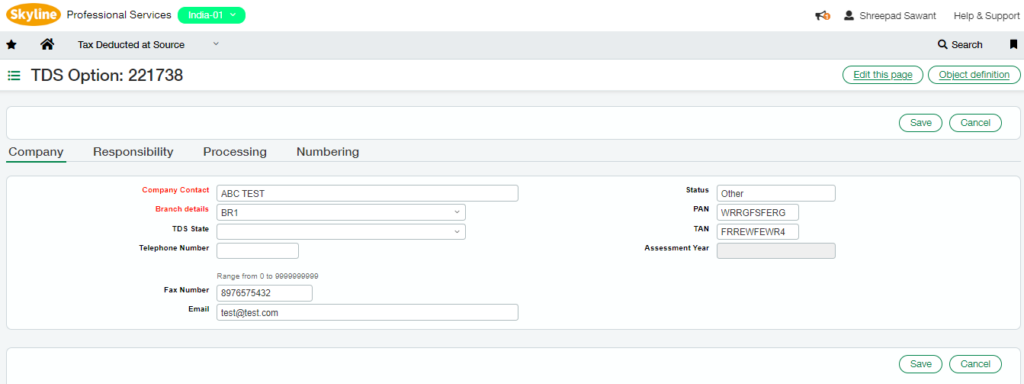
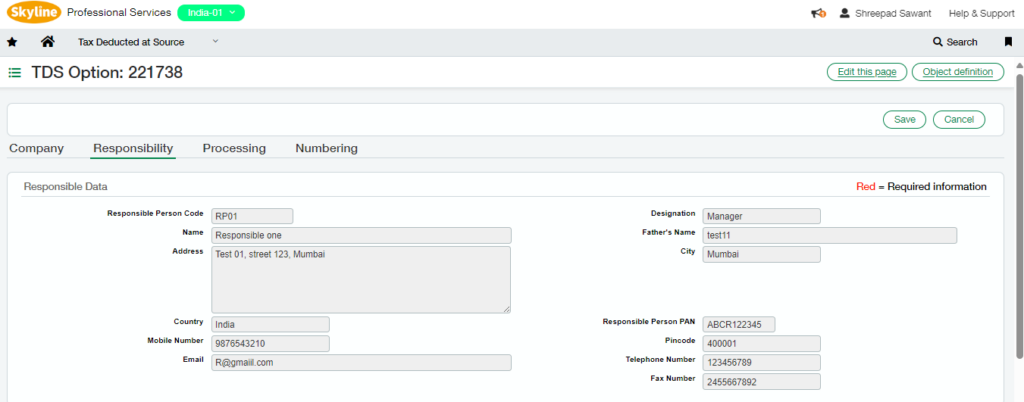
On selection of Branch Details, the details of the Responsible Person assigned to that Branch will auto-flow in the Responsibility Tab. Refer below screenshot
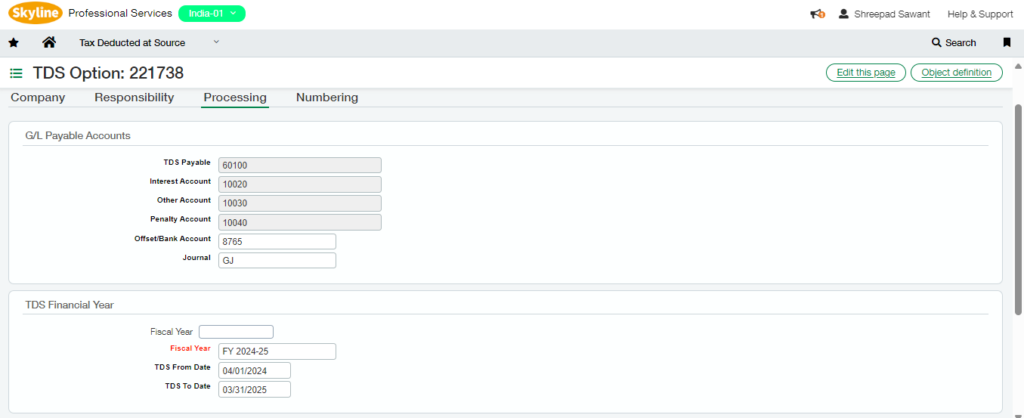
Also, on selection of Branch Details, the Accounts set for that particular Branch will auto-flow in the Processing Tab. Here, user need to enter Fiscal Year for which the TDS Deduction will take place further.
7. TDS Sections: – The TDS Sections UI is used to create various sections, such as Interest on Securities, Rent, Purchase of Goods and Services, Non-Residents, Dividends, and more. Three checkboxes are provided for the user to select scenarios like Cumulative, Threshold, or Tax Included. These sections are then available for selection in the Nature of Deduction UI.

8. TDS States: – Used to create States and its Codes. These States are then assigned to a particular Branch which are then fetched in the TDS Party Details UI and TDS Options UI.

About Us
Greytrix – a globally recognized and one of the oldest Sage Development Partner is a one-stop solution provider for Sage ERP and Sage CRM organizational needs. Being acknowledged and rewarded for multi-man years of experience and expertise, we bring complete end-to-end assistance for your technical consultations, product customizations, data migration, system integrations, third party add-on development and implementation competence.
Greytrix has a wide product range for Sage Intacct- a Cloud ERP. This includes migrations from QuickBooks | Sage 50 | Sage 100 | Sage 300 to Sage Intacct. Our unique GUMU™ integrations include Sage Intacct for Sage CRM | Salesforce | FTP/SFTP | Rev.io | Checkbook | Dynamics 365 CRM | Magento | Rent Manager | Treez | Avalara Avatax | Blackline SFTP. We also offer best-in-class Sage Intacct Development Services, Consulting services, integrated apps like POS | WMS | Payroll | Shipping System | Business Intelligence | eCommerce for Sage Intacct to Sage business partners, resellers, and Sage PSG worldwide. Greytrix constantly develops apps, products, and add-ons to enhance user experience. Sage Intacct add-ons include AR Lockbox File Processing.
Greytrix GUMU™ integration for Sage CRM – Sage Intacct, Sales Commission App for Sage Intacct, and Checkbook.io ACH/Digital Check Payments for Sage powered by GUMU™ are listed on Sage Intacct Marketplace.
The GUMU™ Cloud framework by Greytrix forms the backbone of cloud integrations that are managed in real-time for the processing and execution of application programs at the click of a button.
For more information on Sage Business Cloud Services, please contact us at sagecloud@greytrix.com. We will like to hear from you.

