In Sage X3, there various reports in each module which are printed by users whenever applicable. Also for warehouse users it mandatory to print the labels and stick on the products/Assets. One of our client has requested to design barcode label for their assets in their inventory.
In this blog, we will see how to print the Barcode Labels by using the Crystal Reports. This report get prints all the labels as per the selected parameter range given by the user. This can be handled by using the “Mailing label report wizard” option which is available in the crystal report.
For this we have created a new custom screen name as “Barcode Generation”, from this screen user can print the barcode report. To print the report, we have created the filter parameter of “From Site” and “To Site”, “From Asset and “To Asset”, “From Physical Asset” and “To Physical Asset” from which user can filters the list of Barcode according to the selected range of the parameters.
New Stuff: How to do setup and process for loaned products in Sage X3

Follow the steps below:
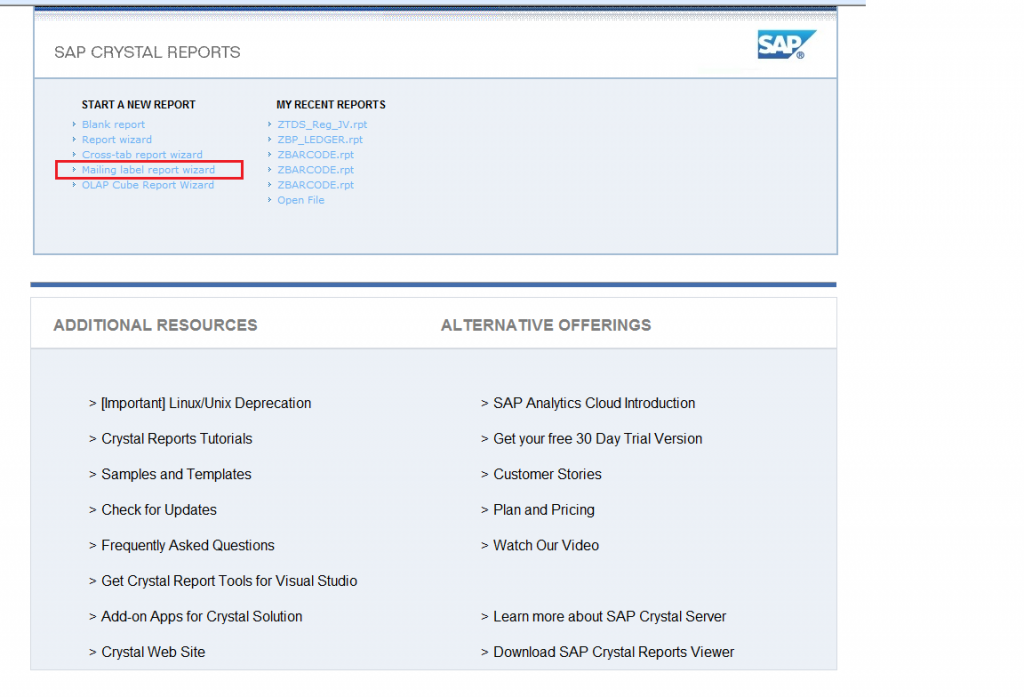
Step 1: Open the Crystal Reports
Step 2: Select the “Mailing label report wizard” option, refer the below screenshot:
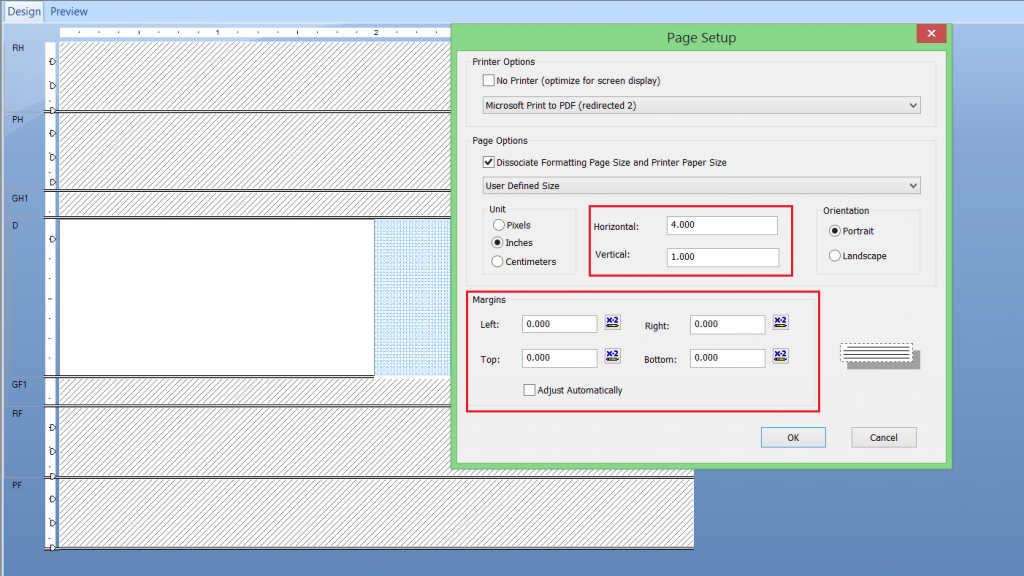
Step 3: Go to File -> Page Setup -> Page Option and adjust the size of the page like Margins, Horizontal and Vertical size according to the size of the label paper.
For Example, let’s assume the size of a label sheet is 4 x 1 inches, with 0 margins (left, right, top & bottom) as shown in the below screenshot:
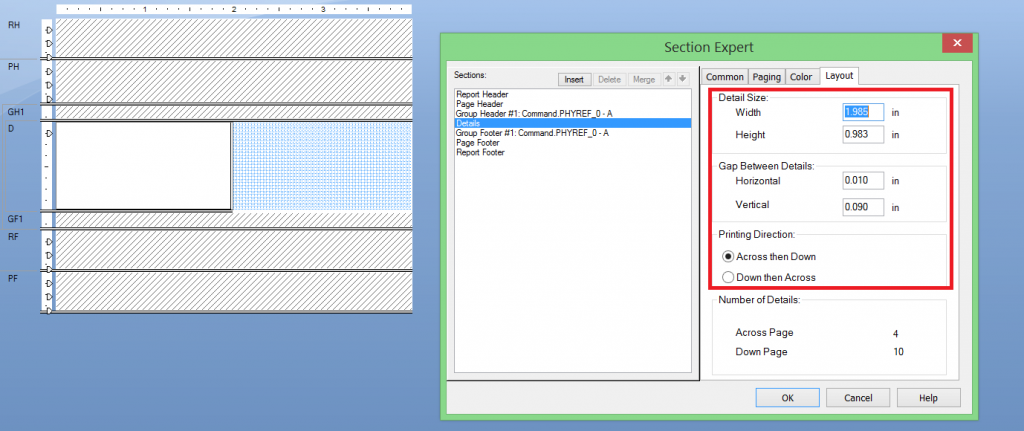
Step 4: We have to adjust the detail line too, according to the size of the single label and give a gap between the labels. Here let’s assume the size of a single label will be 1.985 X 0.983 in.
To Adjust the size of the detail line: Right click on the Section->Section Expert->Layout.
We can adjust the size of the detail line from the “Detail Size” section and to adjust the gap we have to use the section “Gap Between Details”.
We can also give the printing direction from “Printing Direction” section.
If we want the labels to be printed sideways first and then downwards, then we need to select “Across then Down” radio button and if we want the labels to be printed downwards first and then sideways then we need to select “Down then Across” radio button.
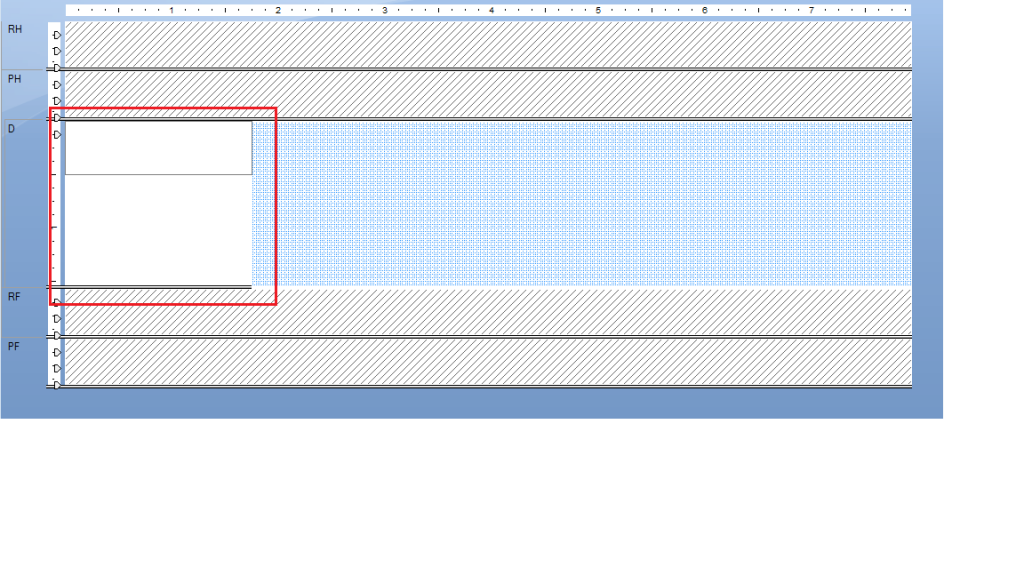
Step 5: On the LHS is where we create the desired format for the Barcode, and the same will be displayed on the RHS.
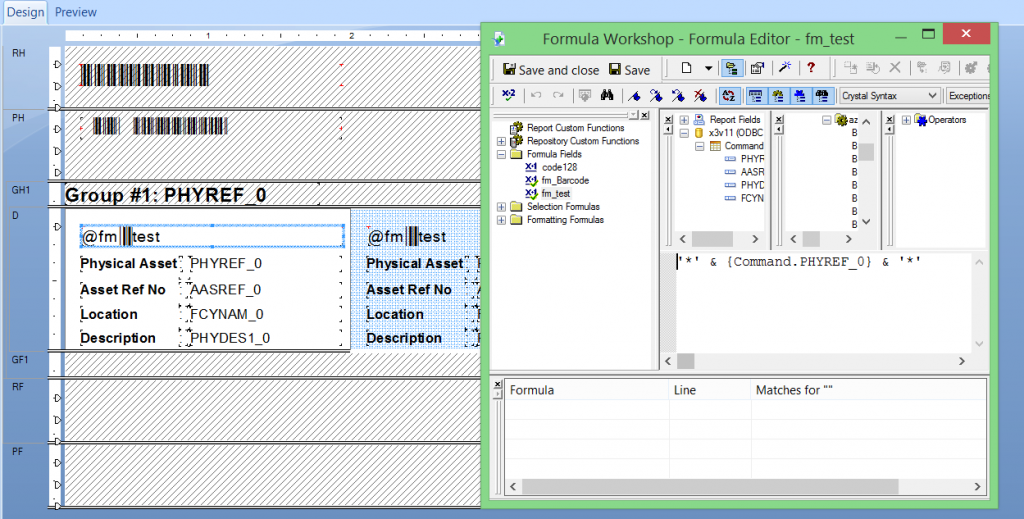
Step 6: Create a group by on the field that gives the barcode, so that each barcode will get printed on a new page. Here we have created a group by based on PHYREF_0 and then created the barcode of the same field.
To get the Barcode of a field, place the field inside the formula like ‘‘ & {your field} & ‘‘ and drag and drop it on the design page.
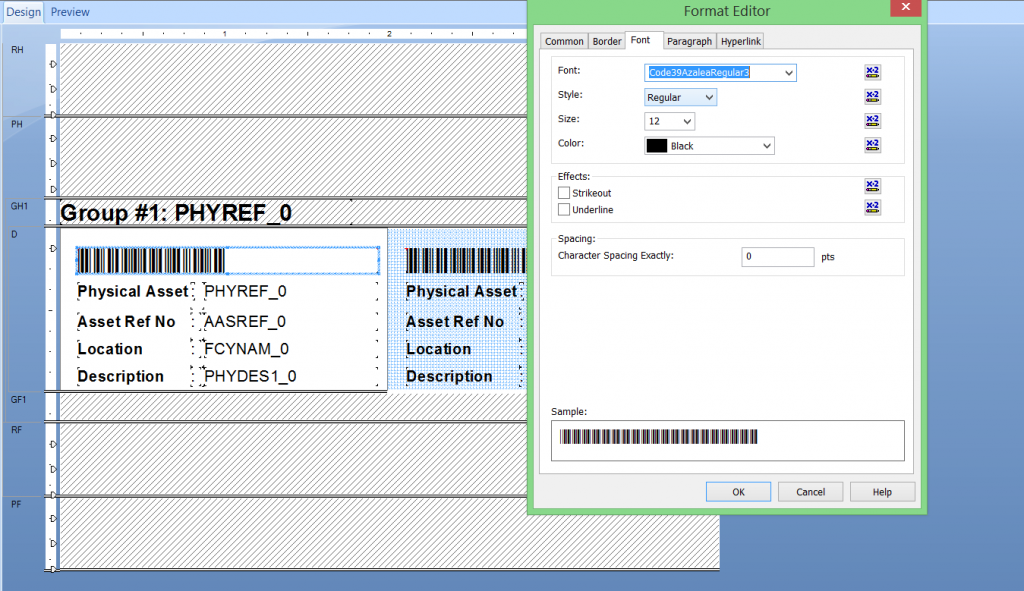
After that right click on the formula field -> Format Editor, Go to Font section and change the text font to “Code39AzaleaRegular3”. By using this, we will get the field which is converted to the barcode. Refer below screenshot:
Step 7: Once done with the above steps from the crystal report, we have to save the report and deploy the report in the respective folder and then print this report from the screen.
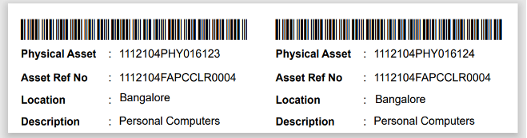
As you can see from the above report output, the barcode is getting printed in “Across then Down” fashion with the help of Mailing Label option from the crystal report.
About Us
Greytrix – a globally recognized and one of the oldest Sage Development Partners is a one-stop solution provider for Sage ERP and Sage CRM organizational needs. Being acknowledged and rewarded for multi-man years of experience and expertise, we bring complete end-to-end assistance for your technical consultations, product customizations, data migration, system integrations, third-party add-on development, and implementation competence.
Greytrix has some unique integration solutions developed for Sage CRM with Sage ERPs namely Sage X3, Sage Intacct, Sage 100, Sage 500, and Sage 300. We also offer best-in-class Sage ERP and Sage CRM customization and development services to Business Partners, End Users, and Sage PSG worldwide. Greytrix helps in the migration of Sage CRM from Salesforce | ACT! | SalesLogix | Goldmine | Sugar CRM | Maximizer. Our Sage CRM Product Suite includes addons like Greytrix Business Manager, Sage CRM Project Manager, Sage CRM Resource Planner, Sage CRM Contract Manager, Sage CRM Event Manager, Sage CRM Budget Planner, Gmail Integration, Sage CRM Mobile Service Signature, Sage CRM CTI Framework.
Greytrix is a recognized Sage Champion Partner for GUMU™ Sage X3 – Sage CRM integration listed on Sage Marketplace and Sage CRM – Sage Intacct integration listed on Sage Intacct Marketplace. The GUMU™ Cloud framework by Greytrix forms the backbone of cloud integrations that are managed in real-time for the processing and execution of application programs at the click of a button.
For more information on our integration solutions, please contact us at sage@greytrix.com. We will be glad to assist you.