Signature workflow is a feature provided by Sage for Automatic signature for a record if it is modified or created by the first level user defined in the Assignment rule. Once the user sign’s the record you will see “Signed” against the user and is processed to the next level of user for signature defined in the Assignment rule in Sage X3.
For one of our clients there was a requirement to add the signature workflow for the such that the Gross Price/ Price defined in the purchase price list doesn’t flow in any of the purchase transactions (Purchase Order, Receipt and Invoice) until the purchase price list has been approved.
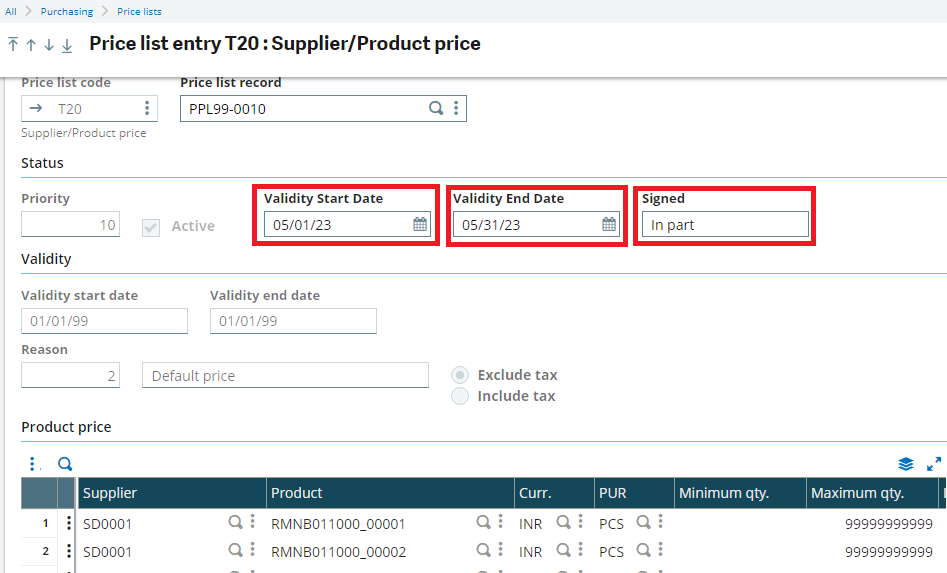
To disable the price list we have added 3 custom fields ZPLISTRDAT (Validity Start Date), ZPLIENDDAT (Validity End Date) field and ZAPPFLG (Signed) in the Purchase price list header screen and disabled the standard field PLISTRDAT (Validity Start Date) and PLIENDDAT (Validity End Date).
On creation/ Modification of a purchase price list backdated value gets updated in the Std field PLISTRDAT and PLIENDDAT (01/01/1999) and the custom fields (ZPLISTRDAT (Validity Start Date) and ZPLIENDDAT (Validity End Date)) has the actual validity date range for the particular transaction. On approval the actual validity date in the custom fields (ZPLISTRDAT and ZPLIENDDAT) gets updated in the std field and the ZAPPFLG gets updated with the respective value from the local menu 280 (1: No, 2: In part, 3: In full) that makes the purchase price flow in the purchase transactions as intended.
Note: The Local Menu description may change based on the patch of X3.
New Stuff: Defaulting Screen/Mask fields in Sage X3

–Create the main Workflow for Purchase price list management.
Step 1:
All -> Setup -> Workflow -> Workflow Rules
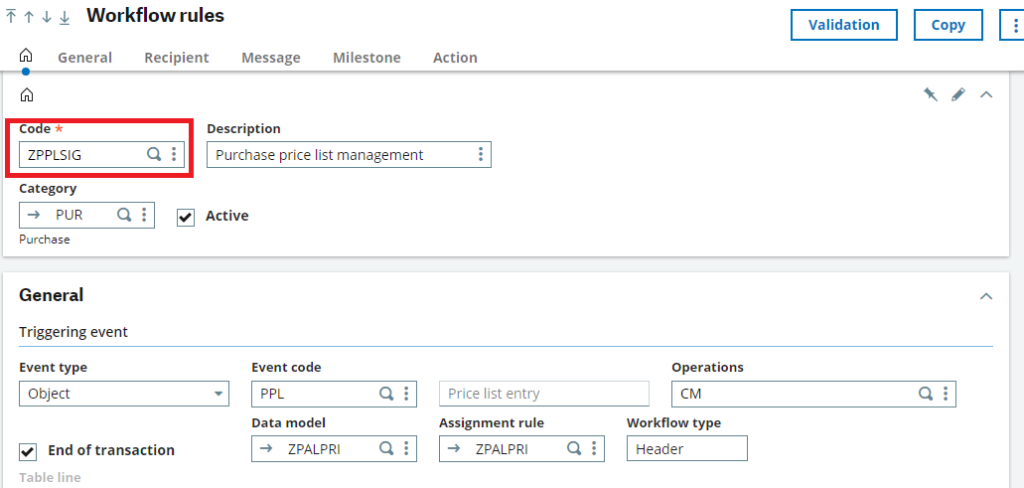
Create a Workflow rule with code ZPPLSIG (Create the duplicate of any standard workflow Ex: POHSIG and change required details) as below:

Step 2:
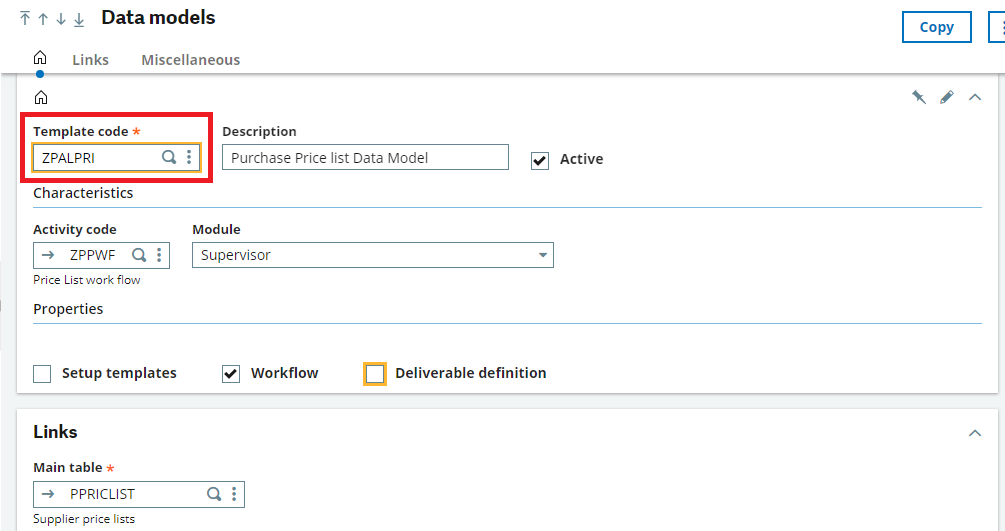
Create a Data Model with Template Code : ZPALPRI (Purchase Price list Data Model)
In the Links tab -> Main table as PPRICLIST.

Step 3:
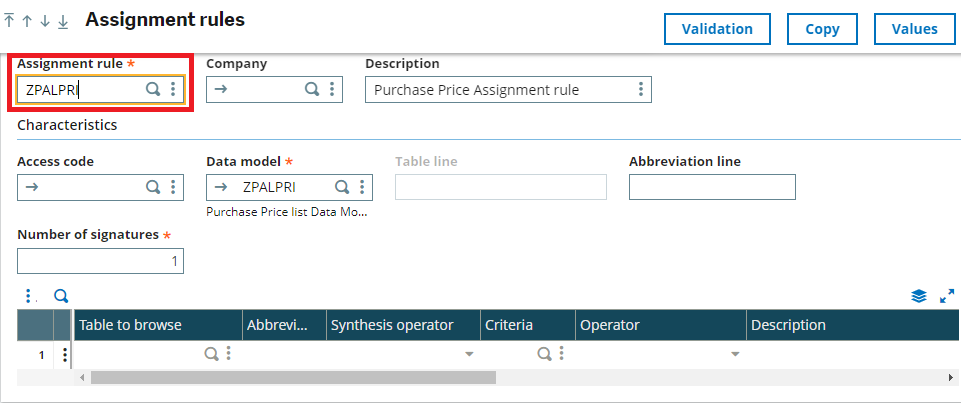
Create an Assignment Rule with ZPALPRI (Purchase Price Assignment Rule) as below:

Click on values and assign the Assignment Rule as ZPALPRI.
In the Values section input the users codes.
Step 4:
Add the below header conditions for the workflow to be triggered.

Step 5:
Add Recipients in the Recipient tab and select “Yes” in Send mail field and “With signature” in Milestone field.
Step 6:
Set below in the Message Tab:
-Select Any in Management section
-Check Return Icon
–Enter return function as GESPPL
Step 7:
Add below in the Context field of Milestone Tab:
-[F:PPL]PLICRD
-[F:PPL]UPDUSR
Add the below details in the Answers of Milestone:

–Create a workflow for Purchase Price No rule notification.
Step 1 :
Create a Workflow rule with ZPPLSIGNCR (Create the duplicate of any standard workflow Ex: POHSIGNCR and change required details)
-Event code as ZPPLSIG
Set the below conditions in the header:
-S_ABREV =”PPL”
-[F:PPL]ZAPPFLG=1
Step 2:
Add Recipient in the Recipient tab and select “Yes” in Send mail field and “Yes” in Milestone field.
Step 3:
Set below in the Message Tab:
-Select Any in Management section
-Check Return Icon
-Enter return function as GESPPL
–Similarly create a workflow for Purchase Price list signature.
Step 1:
Create a Workflow rule with ZPPLSIGVAL (Create the duplicate of any standard workflow Ex: POHSIGVAL and change required details)
-Event code as ZPPLSIG
Set the below conditions in the header:
-S_ABREV =”PPL”
-[F:PPL]ZAPPFLG=2 | [F:PPL]ZAPPFLG=3
Step 2:
Add Recipient in the Recipient tab and select “Yes” in Send mail field and “With signature” in Milestone field.
Step 3:
Set below in the Message Tab:
-Select Any in Management section
-Check Return Icon
-Enter return function as GESPPL
-Enter link key as “[F:PPL]PLI;[F:PPL]PLICRD“
Step 4:
Set the blow in the Answers:

Step 5:
Create an Action as follows :
Enter action code as “ZPPUPDFLG1“
Select template as “Outside model“
Select Type as “Miscellaneous“
Enter Standard script as SPEZPPUPDFLG1 and Subprograms as ZFLGUPDATE
Step 6:
Add ZPPUPDFLG1 Action in Action tab.

Explanation : We have added a custom action in the ZPPLSIGVAL workflow, since we need to update the standard fields of the the validity start and end date based on the date given in the custom field in the sales price list once the Signed field is in “In full” i.e ZAPPFLG is 3 or Signed is in “In part” i.e ZAPPFLG is 2.
We’ve added the 4GL code in SPEZPPPUDFLG1 and SPEPPL scripts to update the ZAPPFLG, PLISTRDAT and PLIENDDAT fields.

