This blog refers to the scenario where we would find out how to add components such as Destinations, Inquiry screens and Database Mass Update while creating a patch. Follow to the below steps to add the mentioned components while creating a patch:
1. Destinations:
Go to the below path to access Patch creation:
Navigation Pages > Development > Utilities > Patches > Patch Creation
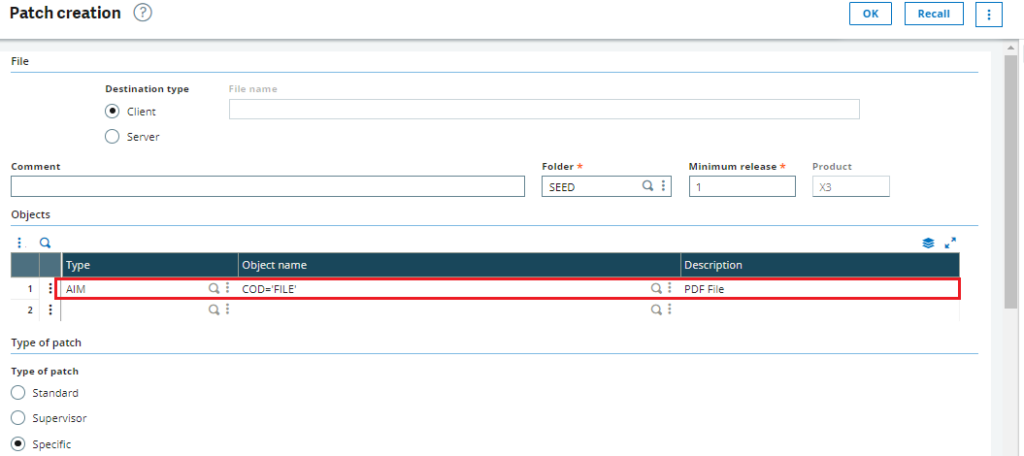
For example, we would consider ‘FILE’ which would provide the output in PDF format.
Fill the details as below into the shown fields:
Type: AIM
Object Name: COD=’FILE’

2. Inquiry Screens:
Go to the below path to access Patch creation:
Navigation Pages > Development > Utilities > Patches > Patch Creation
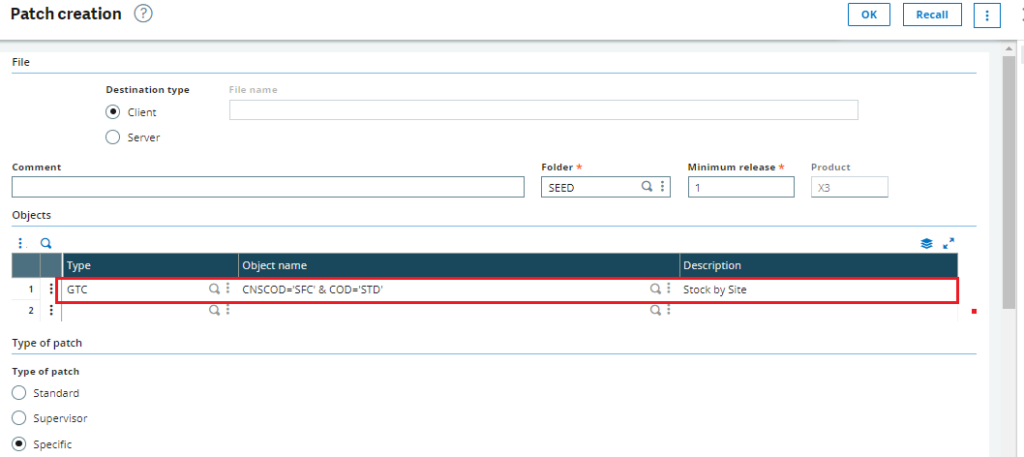
For example, we would consider ‘Stock by Site’ with Inquiry code SFC
Fill the details as below into the shown fields:
Type: GTC
Object Name: CNSCOD=’SFC’ & COD=’STD’

3. Database Mass Update:
Go to the below path to access Patch creation:
Navigation Pages > Development > Utilities > Patches > Patch Creation
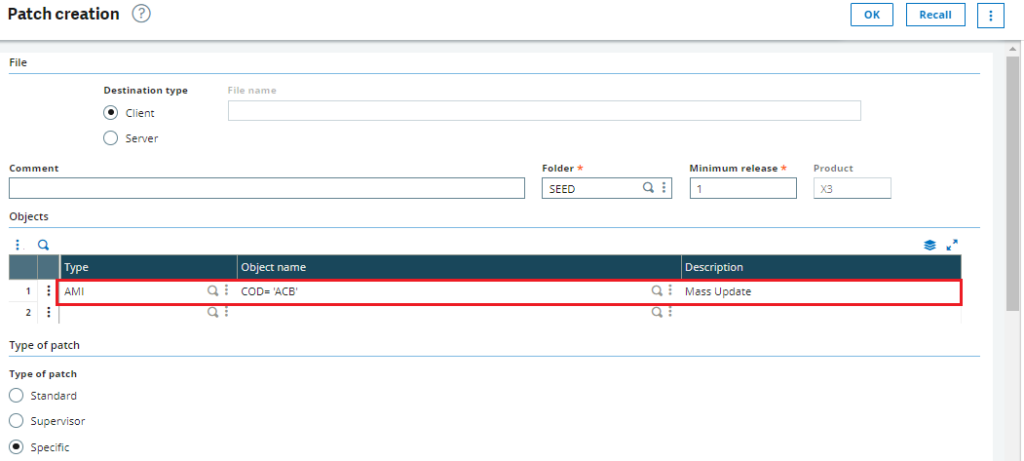
Fill the details as below into the shown fields:
Type: AMI
Object Name: COD= ‘ACB’

Our aim with this blog is to provide practical guidance for enhancing your workflow by incorporating additional components like destinations, inquiry screens, and database mass updates into your patch files. By implementing these additions, we anticipate that you’ll experience a more seamless and efficient work process.

