One more feature of Sage X3 that frequently gets overlooked is the capability of adding controls to a specific field within the system without requiring knowledge of the 4GL language, which is Sage X3’s exclusive coding language.
After realizing that they were continuously using the control action to add custom logic to standard or custom fields, developers made the decision to provide a feature that allowed users to easily add controls to fields via an intuitive interface.
Any field on a screen can have any control added to it. But be advised that after your control is evaluated, the standard logic can sometimes take over and may even override your configuration. This is especially valid for controls that you would include in a standard field.
Key Features:
Here’s how to add controls to fields in Sage X3:
Navigate to : Setup -> General parameters -> Control tables
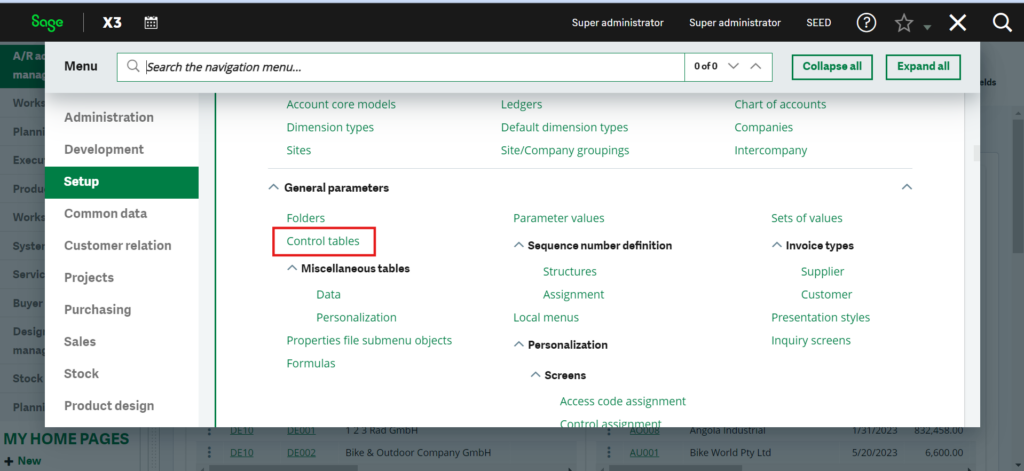
Fig . 1 – Control table
Observe the following points on this screen:
- For the same fields, three controls are configurable. Sequentially, from tab Control 1 to tab Control 3, they will be assessed.
- You can include a control that indicates whether a field is required and under what circumstances.
- The control can be made available upon import, upon entry, or on both occasions.
- The different control types are as follows:
- Mandatory value: only one of the values defined in the control table is authorized.
- Prohibited value: all values are authorized, except the values listed in the control table.
- Range of values: the authorized values are defined within a range.
- Table reference: the value must correspond to a principal key value in a table defined elsewhere.
- Expression: a logical expression built with the formula wizard that must be verified by a control value.
- At the bottom of the screen, you enter the message that will be displayed if the condition is met.
It might be a good idea to add a control to the sales order screen’s currency field.
The majority of currencies are preconfigured in Sage X3, a genuine multi-currency program. You still have control over which values can be entered into a specific currency field without having to remove each currency one at a time.
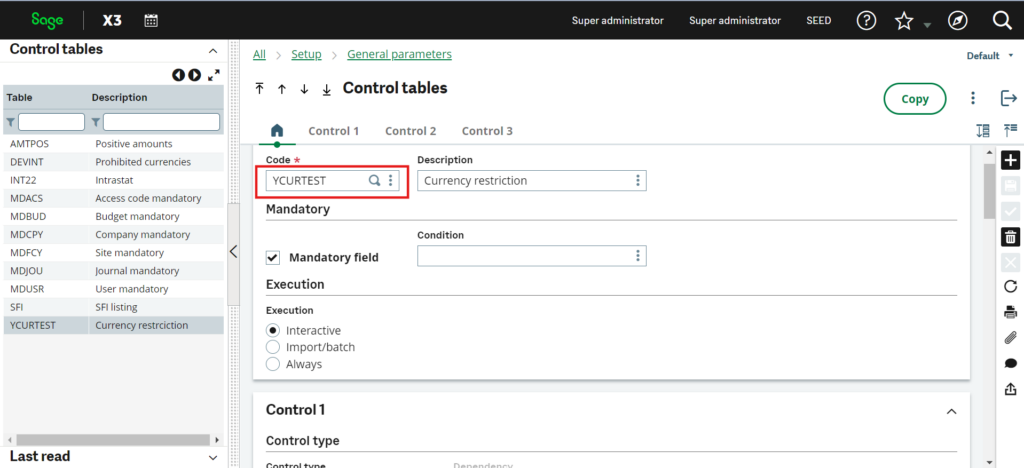
Fig. 2 – Create currency restriction control
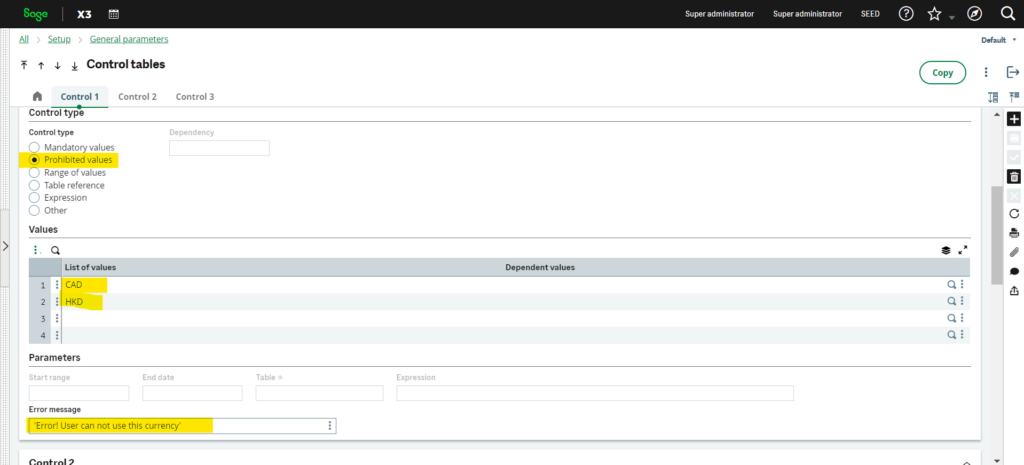
Fig. 3 – Set conditions
There is a specific function called control assignment that you can use to associate the control you just created with the field on the screen:
Navigate to : Setup → General Parameters → Control assignment
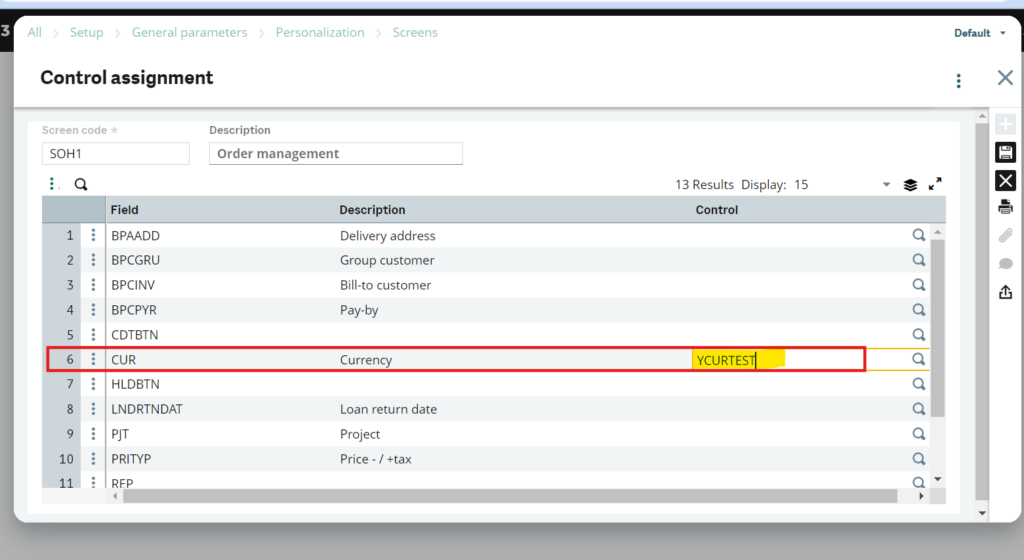
Fig. 4 – Create Control assignment
Once you save the above, you will need to validate the entry transactions you use in your system because the sales order is an entry transaction driven screen.
Suppose you are utilizing the ALL entry transaction exclusively. To validate the ALL entry transaction,
Navigate to : Setup → Sales → Entry transactions → Orders and then validate the ALL entry transaction.
Now, if you go to the sales order and enter the CAD currency, you should get a blocking control that prevents you from selecting it and giving you an error message when you try.
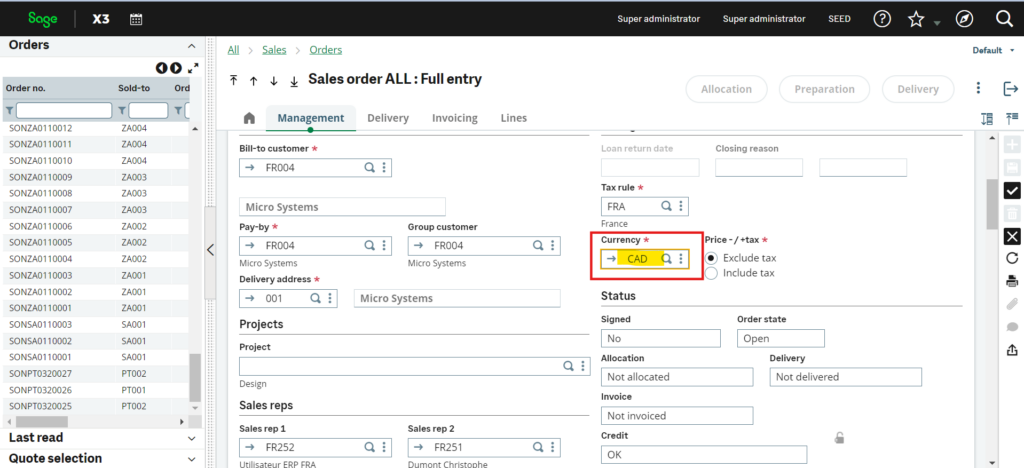
Fig. 5 – Create Sales order with CAD currency
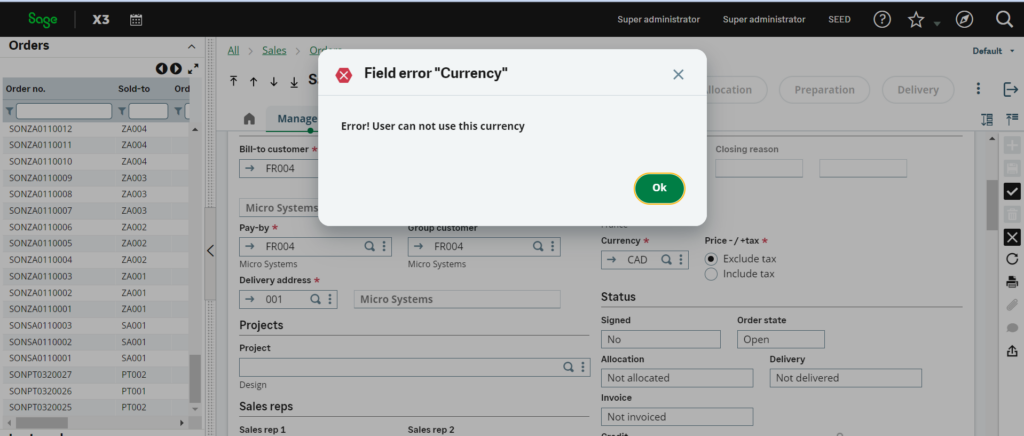
Fig. 6 – Error message
Adding controls to fields in Sage X3 can significantly enhance data accuracy, streamline processes, and improve overall system usability. By implementing robust controls, such as validation rules, default values, and field-level security, organizations can ensure data integrity and consistency. These controls help minimize errors, prevent unauthorized access to sensitive information, and guide users towards accurate data entry. Ultimately, the incorporation of controls fosters efficiency, reliability, and compliance within Sage X3, empowering businesses to make informed decisions based on reliable data.

