In this demonstration, we will explore how to manually issue a product from different locations.
If you need to allocate your product from a specific location, Sage X3 offers a feature that allows users to allocate products from any required location, including multiple locations.
Please follow below steps:
Create an Order.
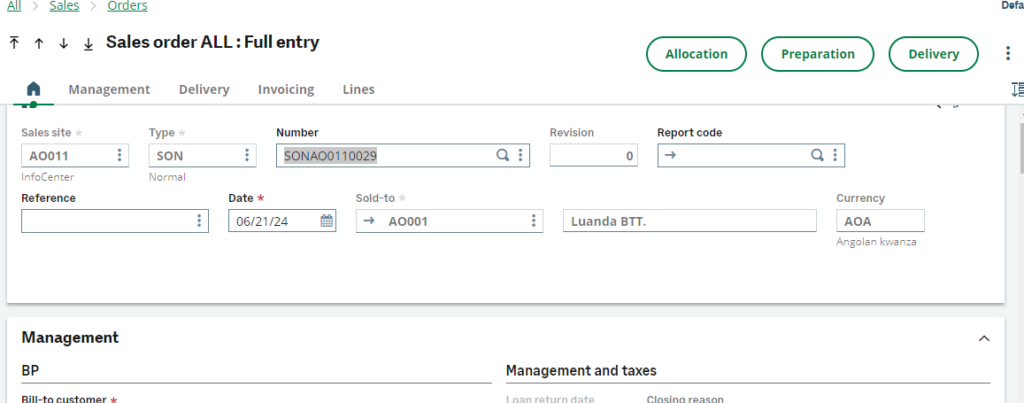
Fig 1: Sales Order

Fig 2: Sales Order Line
Allocate the Order by clicking on the Allocation button.
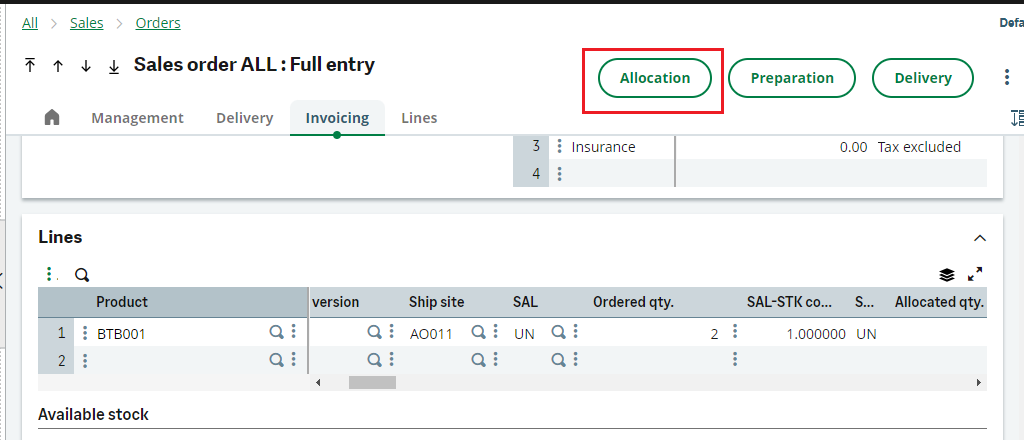
Fig 3: Allocation
View the Allocation and we can see the product is allocated from “A1C11” Location

Fig 4: Allocation View
Click on the action 3 dots at line level and select Manual Allocation
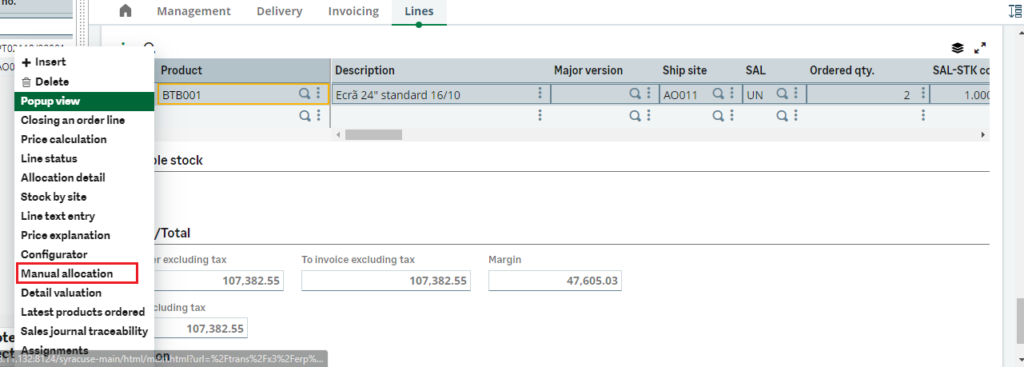
Fig 5: Manual Allocation
Click on the refresh icon from right side. you will see All the Locations on left side
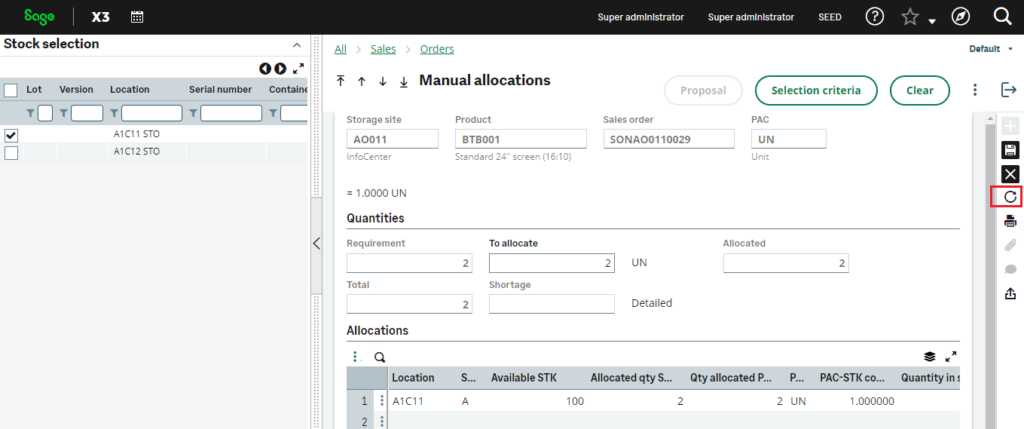
Fig 6: Manual Allocation Screen
Deselect current location and select different location from the stock selection left panel, automatically the lines in Allocation section is changed to Location A1C12. Click on save button.
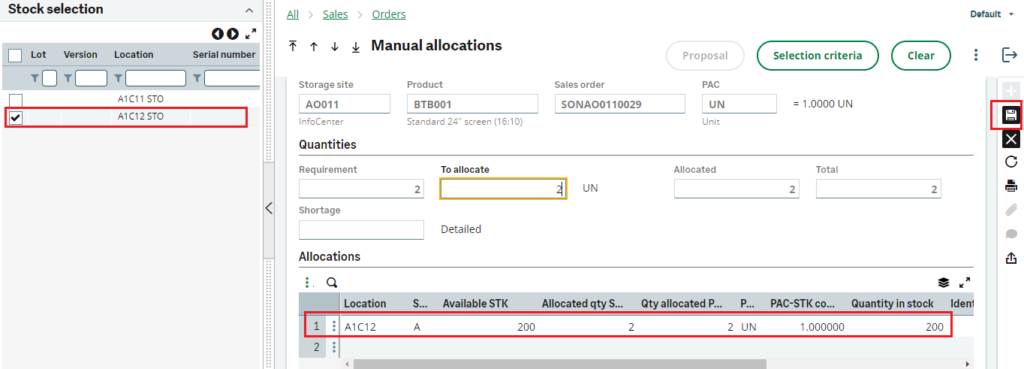
Fig 7: Allocation Change screen
Now come back to Order screen and in the Allocation, button view the Allocation Location. We can see below the Location is changed to A1C12.

Fig 8: Changed Allocation Location
This way the allocation Location is changed.
Thus, we have checked the steps in which we can issue a product from required Location manually.

