This blog will discuss how to create Custom Salesforce Notification using the Process Builder Salesforce platform. We have considered the Order Creation process, but it can be enhanced and used for any procedure.
Below are the steps for Creating a new “Custom Notification” using Process Builder for Custom Objects using Process Builder.
Steps to Define Custom Notification
- Firstly, login into your Salesforce Account.
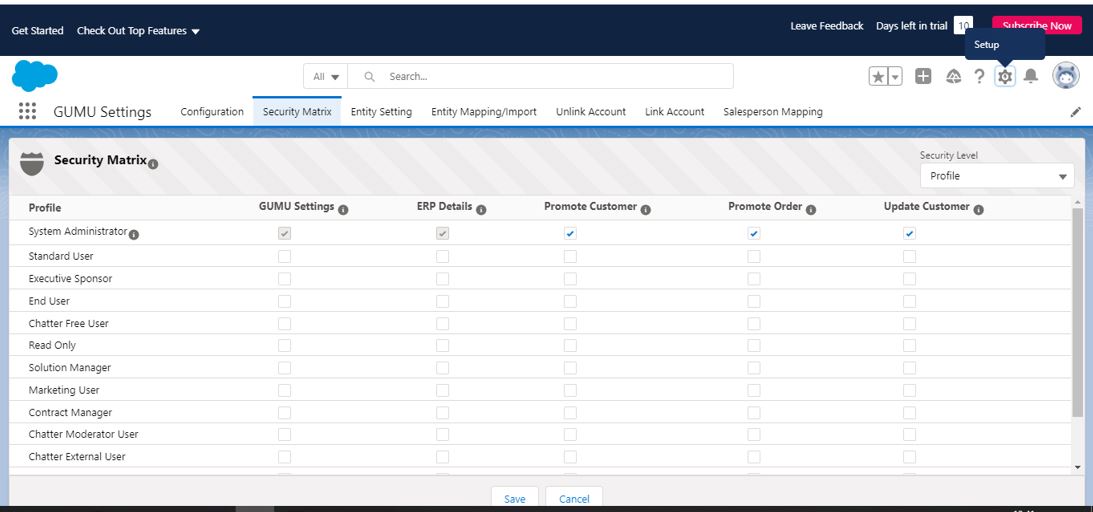
- Secondly, click on the gear box on the right corner of screen and select Setup.
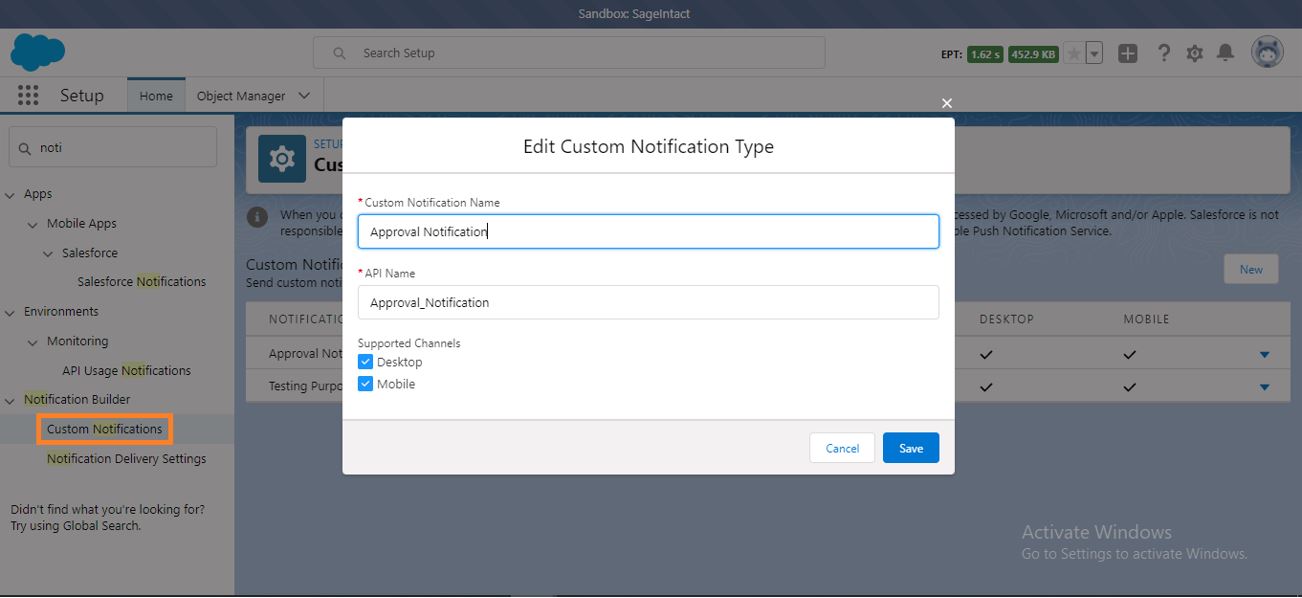
- Now, click on Enter Notification Builder in the Quick Find box in Setup, then select Custom Notifications. Enter the Custom Notification Name > Select API Name > Tick the Check Box Desktop and Mobile and Click Save.
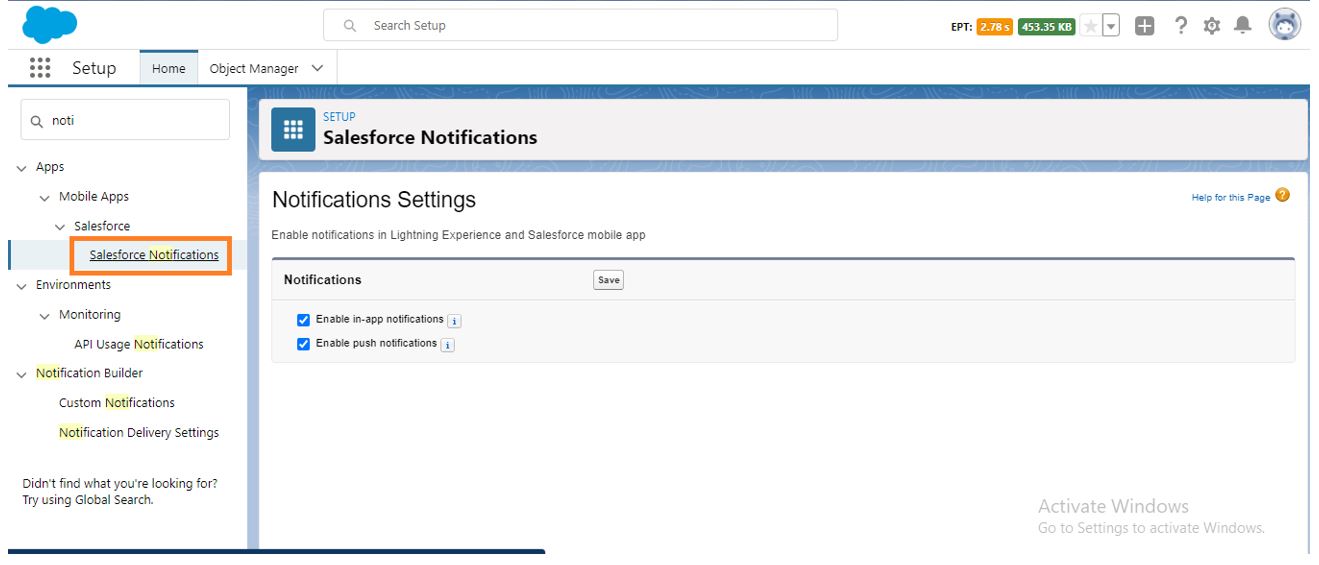
- Once Custom Notification type saved, Now type Salesforce Notification in Quick Find Box.
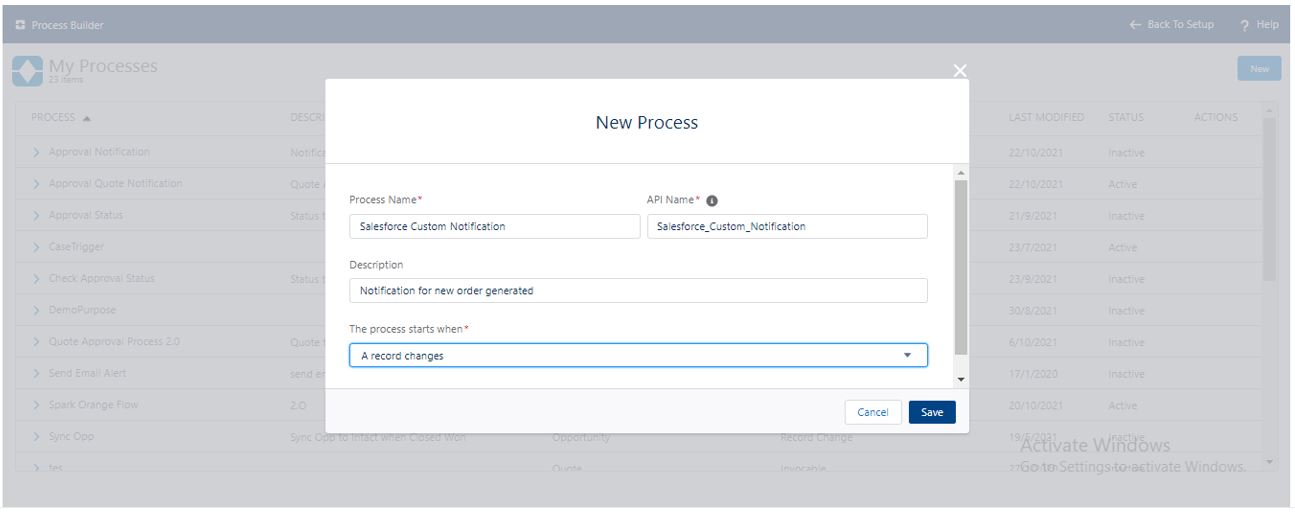
- Now Type Process Automation in Quick Find box select the Process Builder once you have s click on New process as shown in below fig. Steps should be noted before you are going to make custom notification in Salesforce.
- Step 1. Process Name
- Step 2. API Name
- Step 3. Description
- Step 4. Process Starts When*
- Step 5. Click Save.
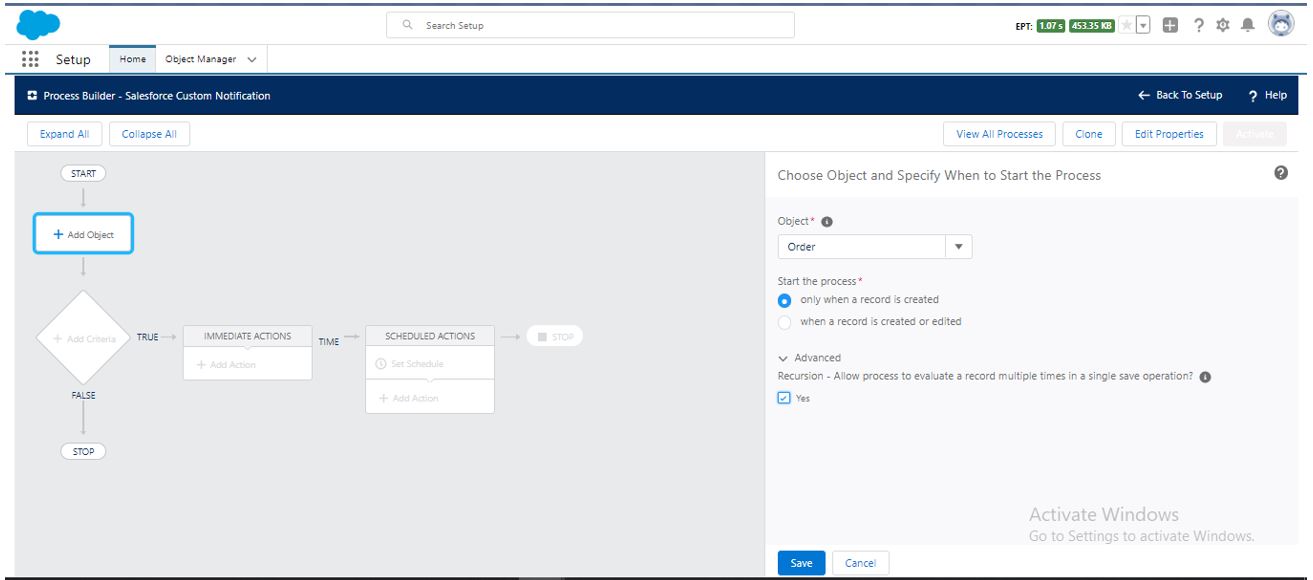
- Now, once process builder has been saved create custom objects for Salesforce Custom notification. Now select custom objects that we wanted to create Click on Start the process only when records been created.
- Check the YES BOX
- Click Save
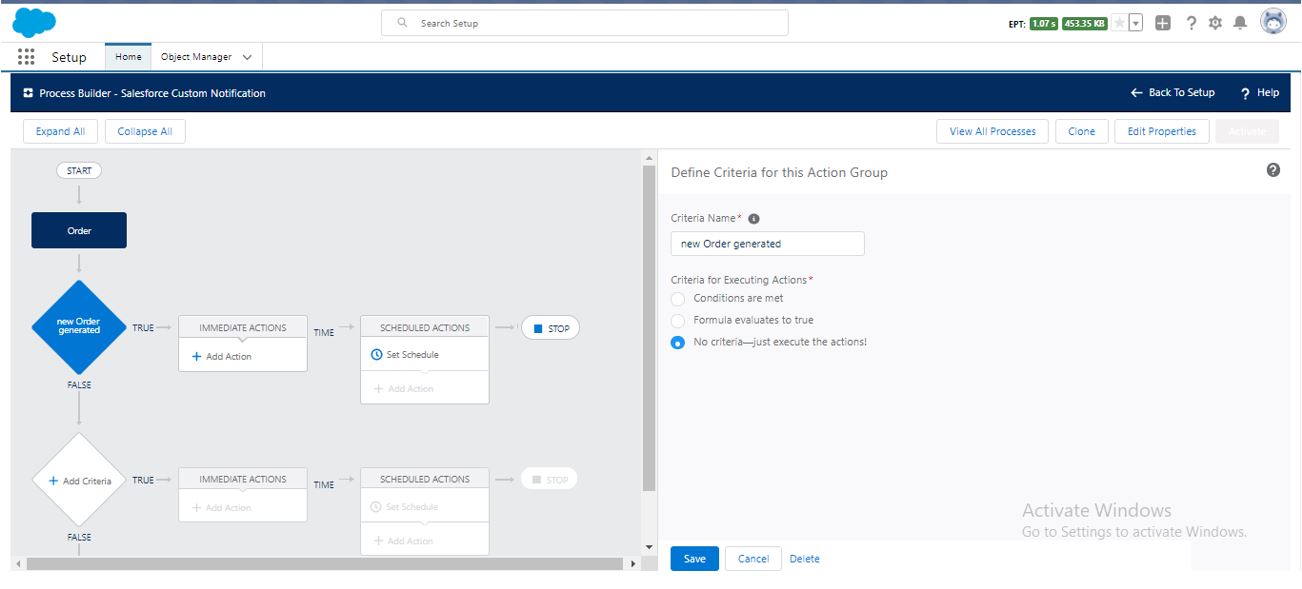
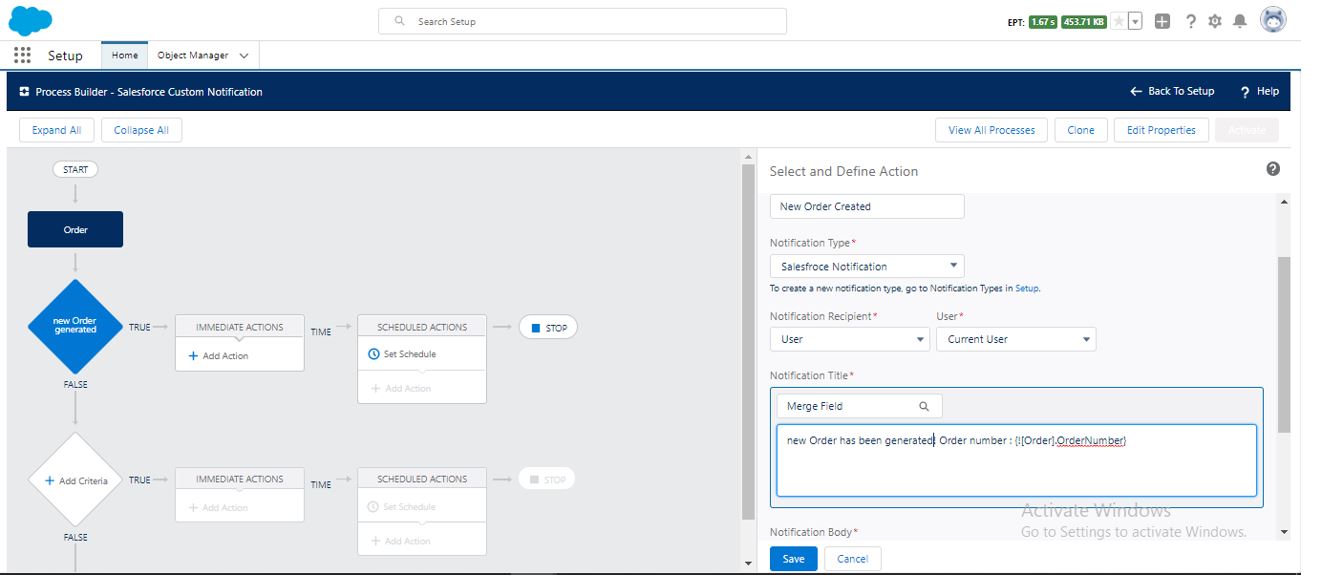
- Finally, start defining the criteria you wanted to create in the action group, as shown below.
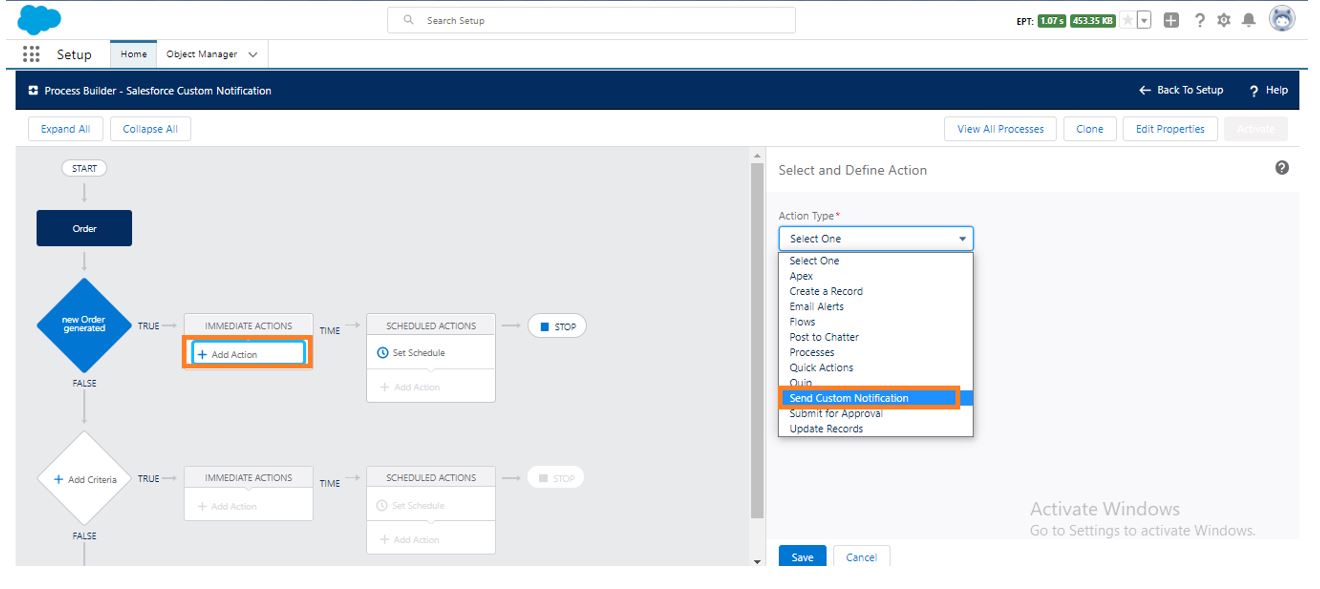
- Once Action Group has been selected define the action type that you wanted to create for example: Salesforce Notification Click save once action type has been selected as shown in below fig.
- Similarly, define Action type you wanted to create in custom notification. Now, Write the process builder for the Order number in the Notification title. Click on Save Button.
Activation and Output
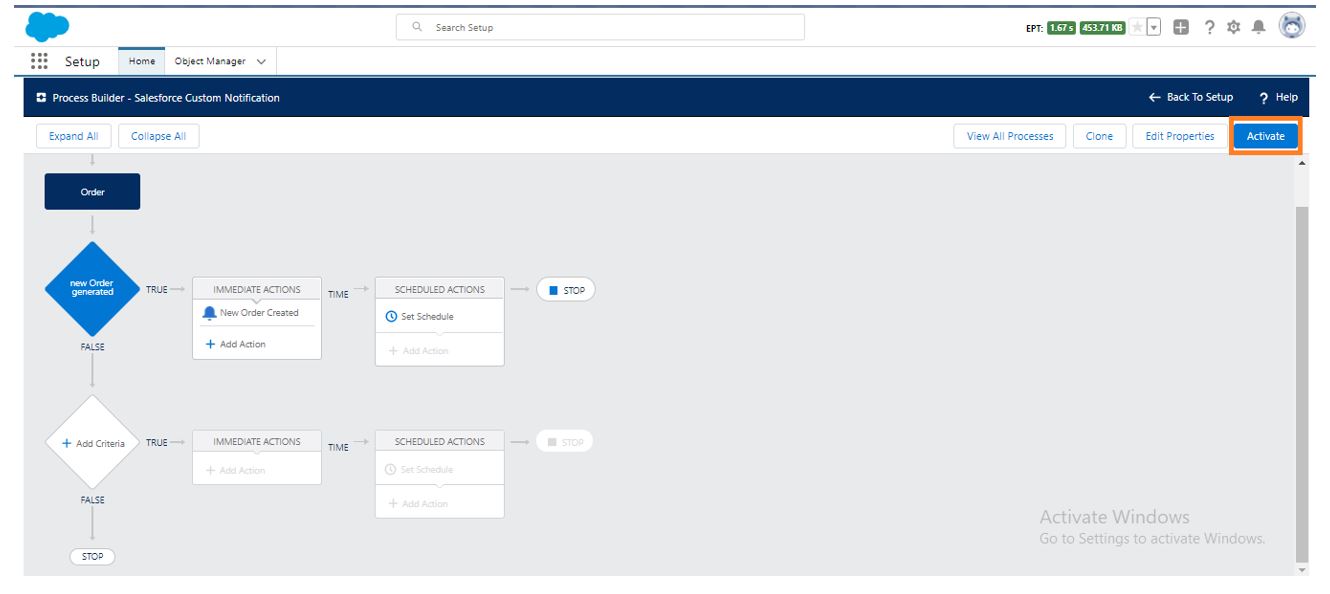
- Once all the Custom Notification has been added, click on the Activate button to start the Custom Notification Process Builder, as shown in the figure below.
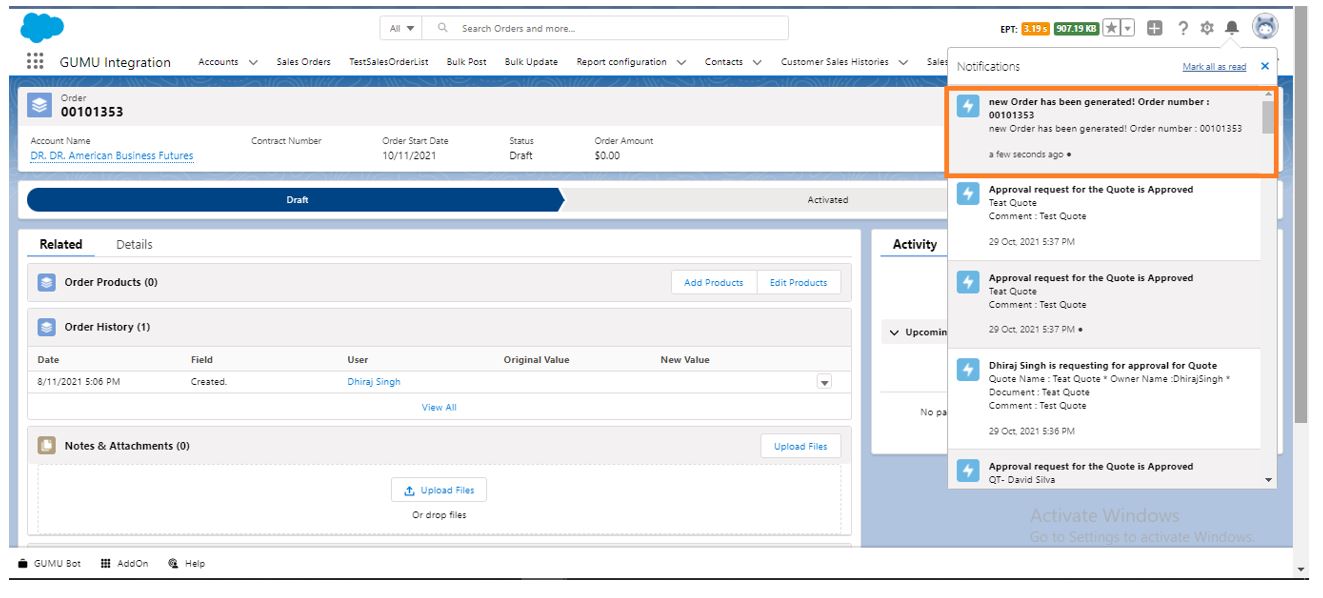
- Now Create New Quote against the Opportunity; check the Custom Notification once the order has been generated. You will get a notification on the bell icon as shown in the below fig.
To sum up, using the steps mentioned above, you can add custom notifications to any routines that you need in your Salesforce org.
We hope you may find this blog resourceful and helpful. If you still have concerns and need more help, please get in touch with us at salesforce@greytrix.com.
About Us
Greytrix – a globally recognized and one of the oldest Sage Development Partner and a Salesforce Product development partner offers a wide variety of integration products and services to the end users as well as to the Partners and Sage PSG across the globe. We offer Consultation, Configuration, Training and support services in out-of-the-box functionality as well as customizations to incorporate custom business rules and functionalities that require apex code incorporation into the Salesforce platform.
Greytrix has some unique solutions for Cloud CRM such as Salesforce Sage integration for Sage X3, Sage 100 and Sage 300 (Sage Accpac). We also offer best-in-class Cloud CRM Salesforce customization and development services along with services such as Salesforce Data Migration, Integrated App development, Custom App development and Technical Support business partners and end users.
Salesforce Cloud CRM integration offered by Greytrix works with Lightning web components and supports standard opportunity workflow. Greytrix GUMU™ integration for Sage ERP – Salesforce is a 5-star rated app listed on Salesforce AppExchange.
The GUMU™ Cloud framework by Greytrix forms the backbone of cloud integrations that are managed in real-time for processing and execution of application programs at the click of a button.
For more information on our Salesforce products and services, contact us at salesforce@greytrix.com. We will be glad to assist you.
Related Posts

