In this blog, we will delve into the steps required to abort all existing background Apex Jobs within the Entity Mapping/Import module in Salesforce. The blog will cover:
- Understanding Apex Jobs: A brief overview of what Apex Jobs are and their role within Salesforce.
- Identifying Active Jobs: How to identify and list all active background Apex Jobs in the Entity Mapping/Import module.
- Aborting Jobs: Detailed, step-by-step instructions on how to abort or stop these jobs effectively.
What Apex Jobs are and their role within Salesforce?
Apex Jobs are asynchronous processes that run in the background in Salesforce. These jobs allow for tasks that are computationally intensive or time-consuming to be performed without blocking the user interface or affecting the performance of immediate, user-driven actions. Here are some key points about Apex Jobs and their role within Salesforce:
Role and Importance:
- Performance Optimization: By offloading heavy or long-running processes to the background, Apex Jobs help in maintaining the responsiveness and performance of the Salesforce user interface.
- Data Processing: Apex Jobs are essential for batch processing of data, such as mass updates, data migrations, and integrations with external systems.
- Automation: They enable automation of repetitive tasks and scheduled operations, such as daily data cleanup or sending periodic notifications.
- Scalability: Apex Jobs allow Salesforce to handle large datasets and complex operations efficiently, supporting the scalability needs of growing businesses.
Steps to abort all existing background Apex Jobs
- Log in to Salesforce.
- Click on the gear icon in the upper right corner to open the Setup menu.
- Select the “Setup” from the dropdown menu.
- In the Quick Find box, search for “Custom Settings”.
- Click on the “Custom Settings” under the Custom Code section. Next, click on the ‘Manage’ link besides the ‘Standard Settings’ label.
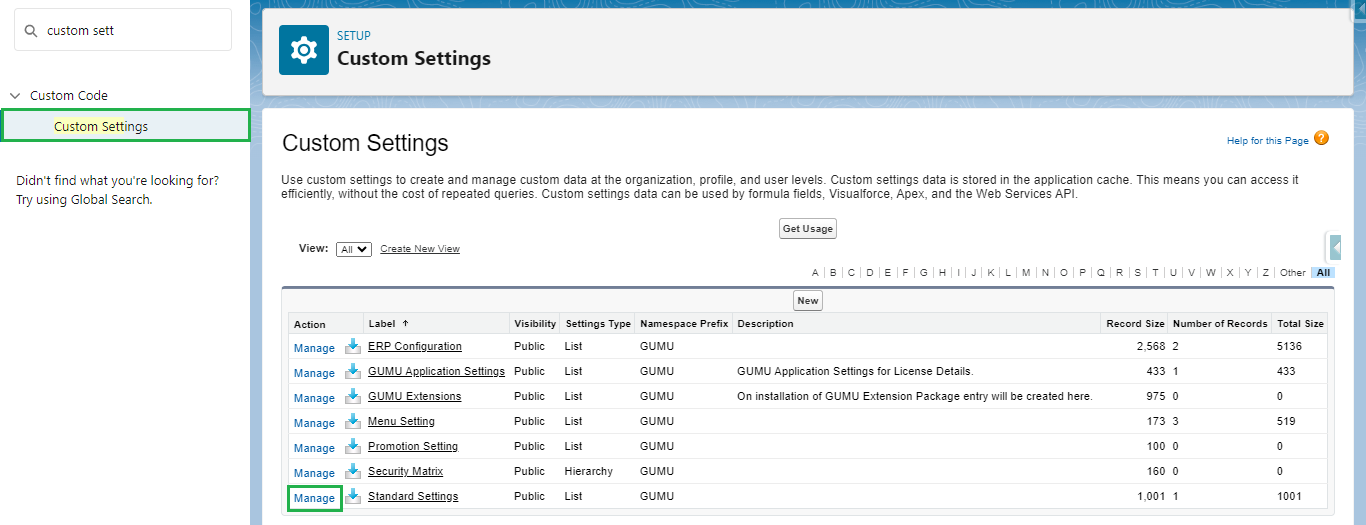
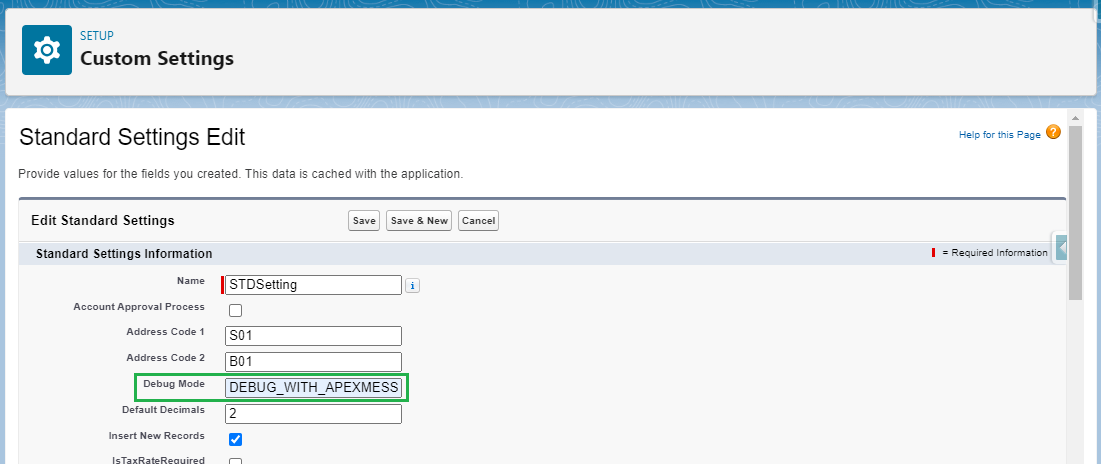
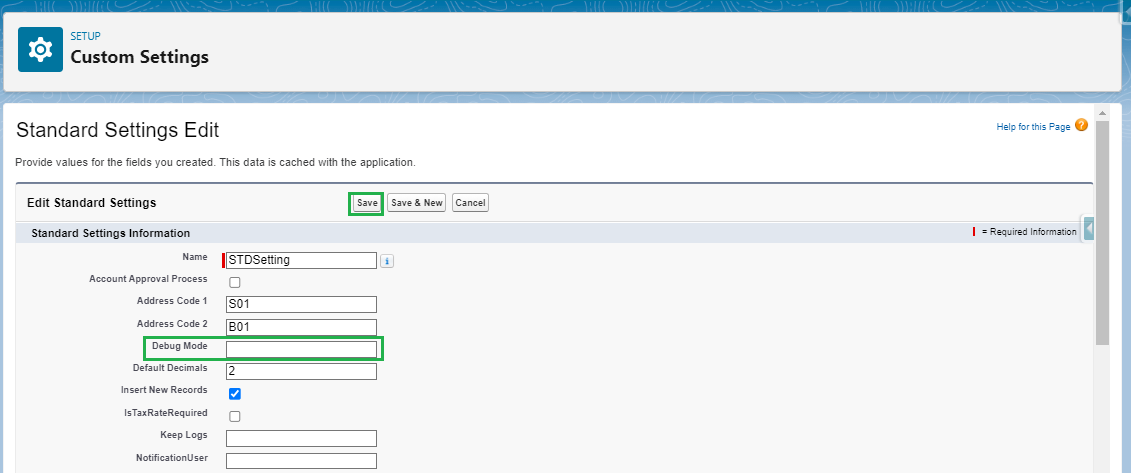
- Click on the Edit link besides the STDSetting.
- In the ‘Debug Mode’ text field paste the following message “DEBUG_WITH_APEXMESSAGE” and click on Save button. this will help with abort all existing background Apex Jobs.
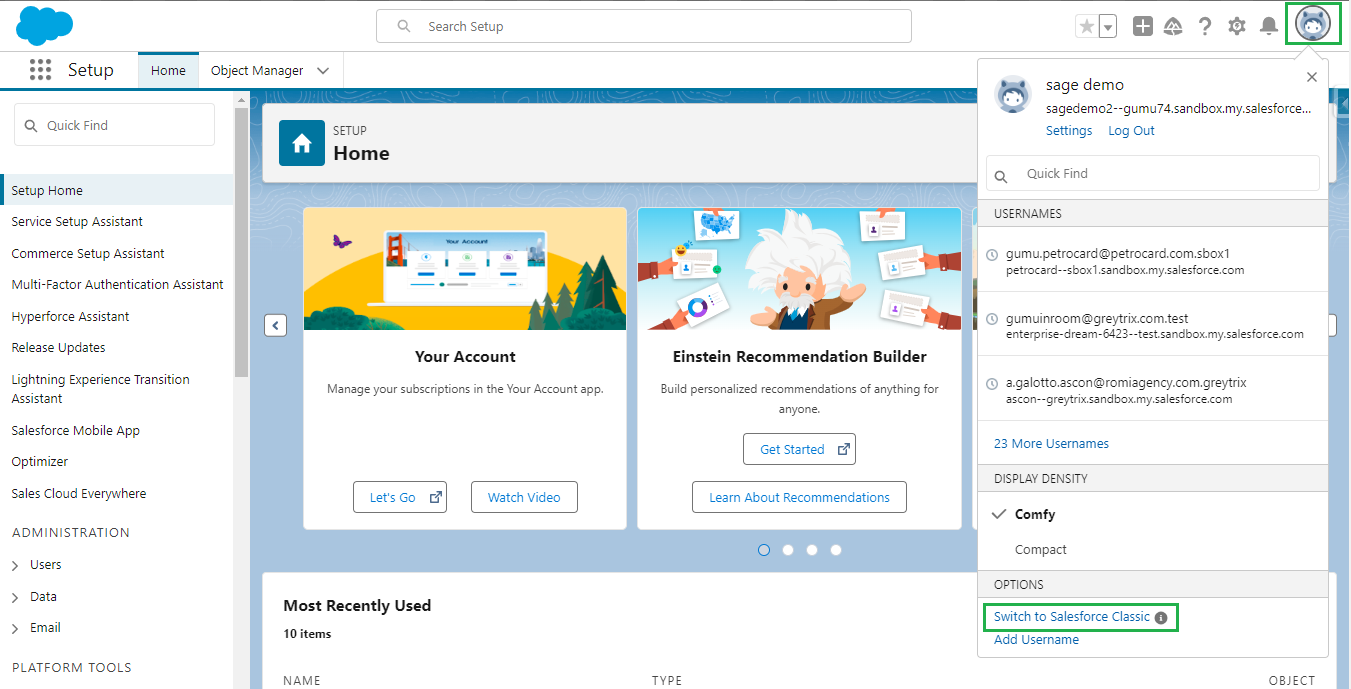
- After saving the changes, click on the Profile icon and click on ‘Switch to Salesforce Classic’. This is a required step to abort all existing background Apex Jobs.
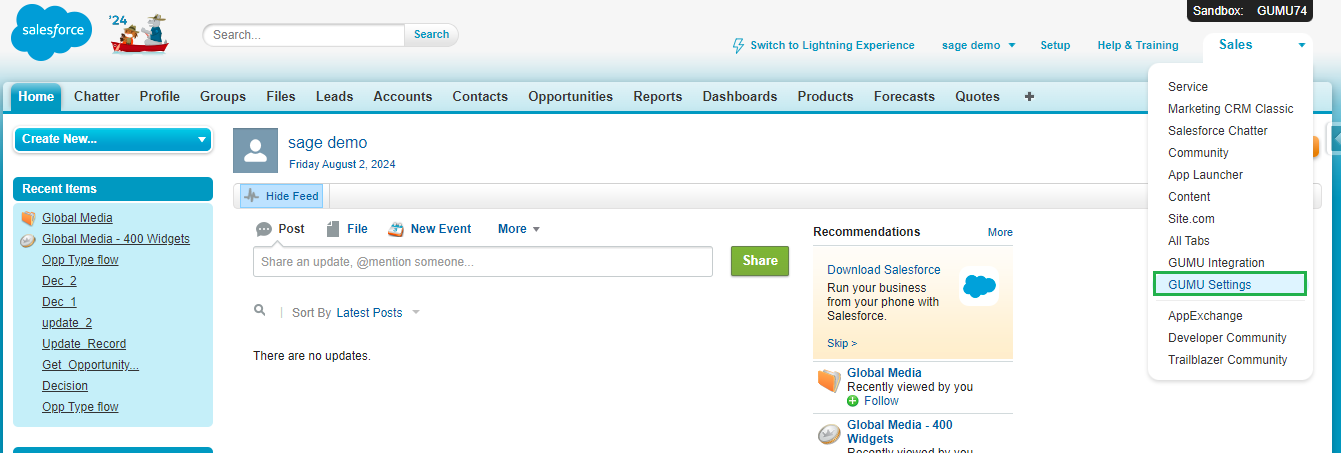
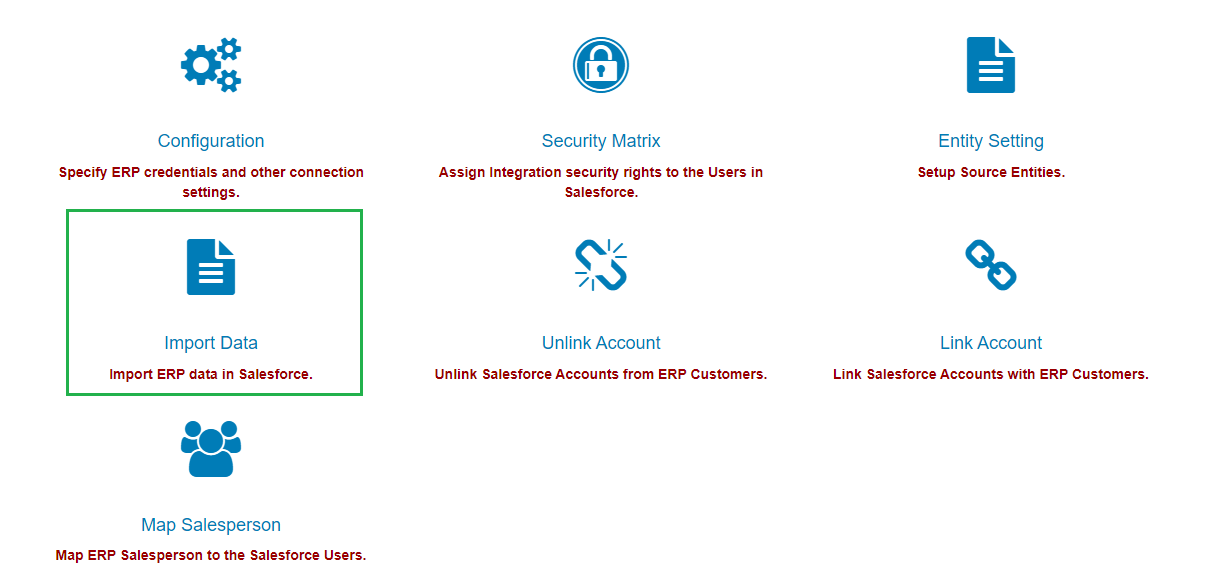
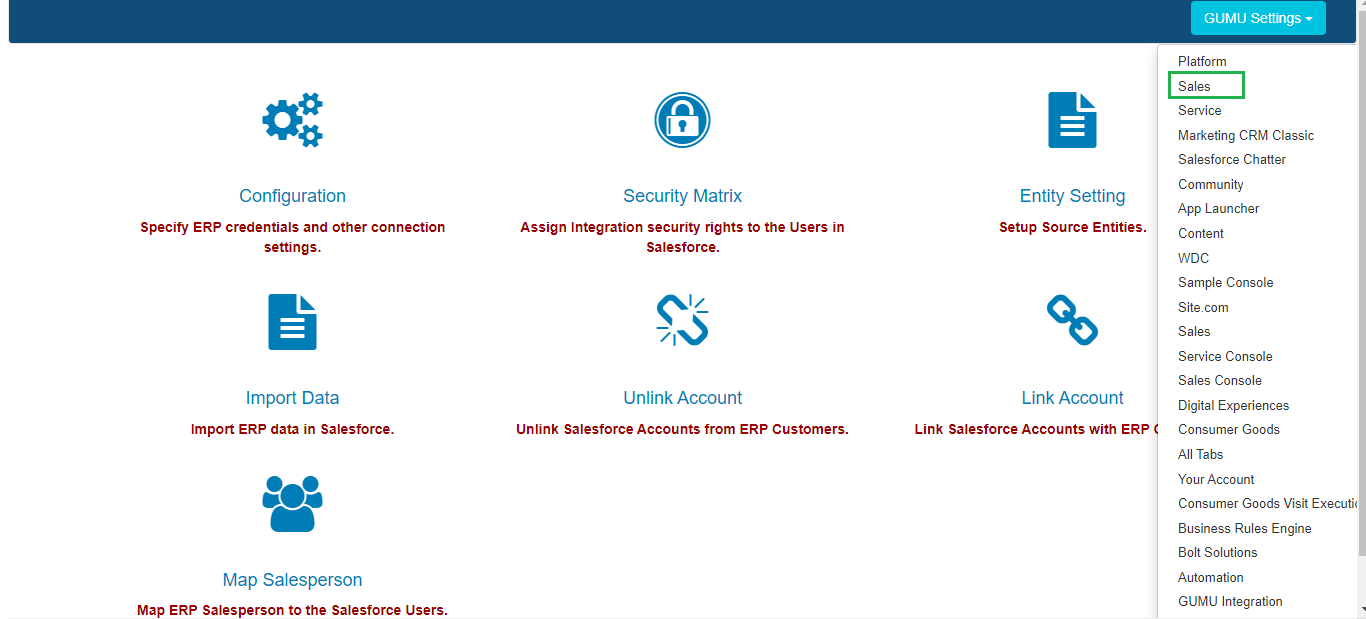
- A new screen will appear. Select the Sales App dropdown, then choose the GUMU Settings option. After that, click on the Import Data link.
- Select the Import Data option, and the Entity Sync Mapping page will appear. From here, choose the import routine you wish to stop. For example, we will select the CustomerAddress Import routine. Next, click on the ‘View/Delete’ link next to the CustomerAddress Import routine.
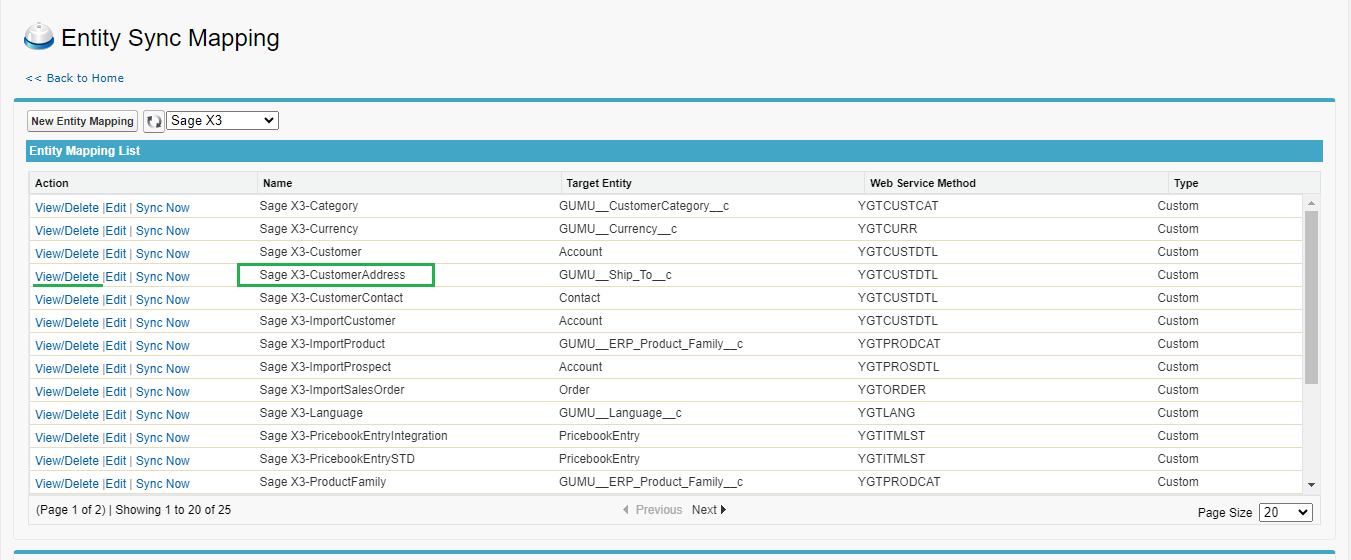
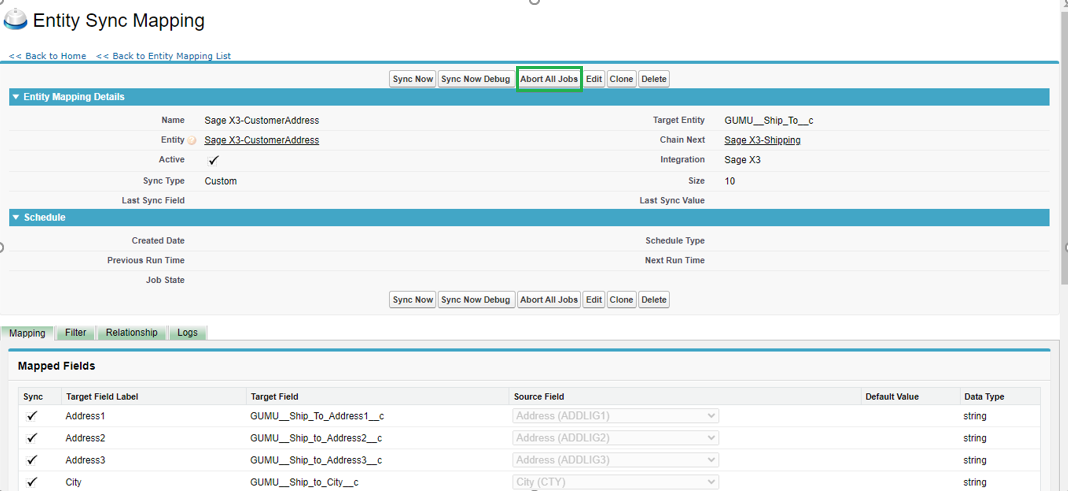
- Click on the Abort All Jobs button, this will abort all existing background Apex Jobs and then, click on ‘Back to Home’ link.
- To verify if the jobs have been aborted, switch back to the Sales App and click on “Switch to Lightning Experience.”

- Navigate to Setup -> Custom Settings -> Standard Settings -> Manage -> Edit -> STDSetting. After aborting all jobs, remove the entered message from the Debug Mode field. Click on Save button after removing the message.
Note:
Make sure to remove the message “DEBUG_WITH_APEXMESSAGE” from the Debug Mode field after aborting the jobs.
- Finally, verify that the jobs have been stopped by checking the “Apex Jobs” section in Setup.
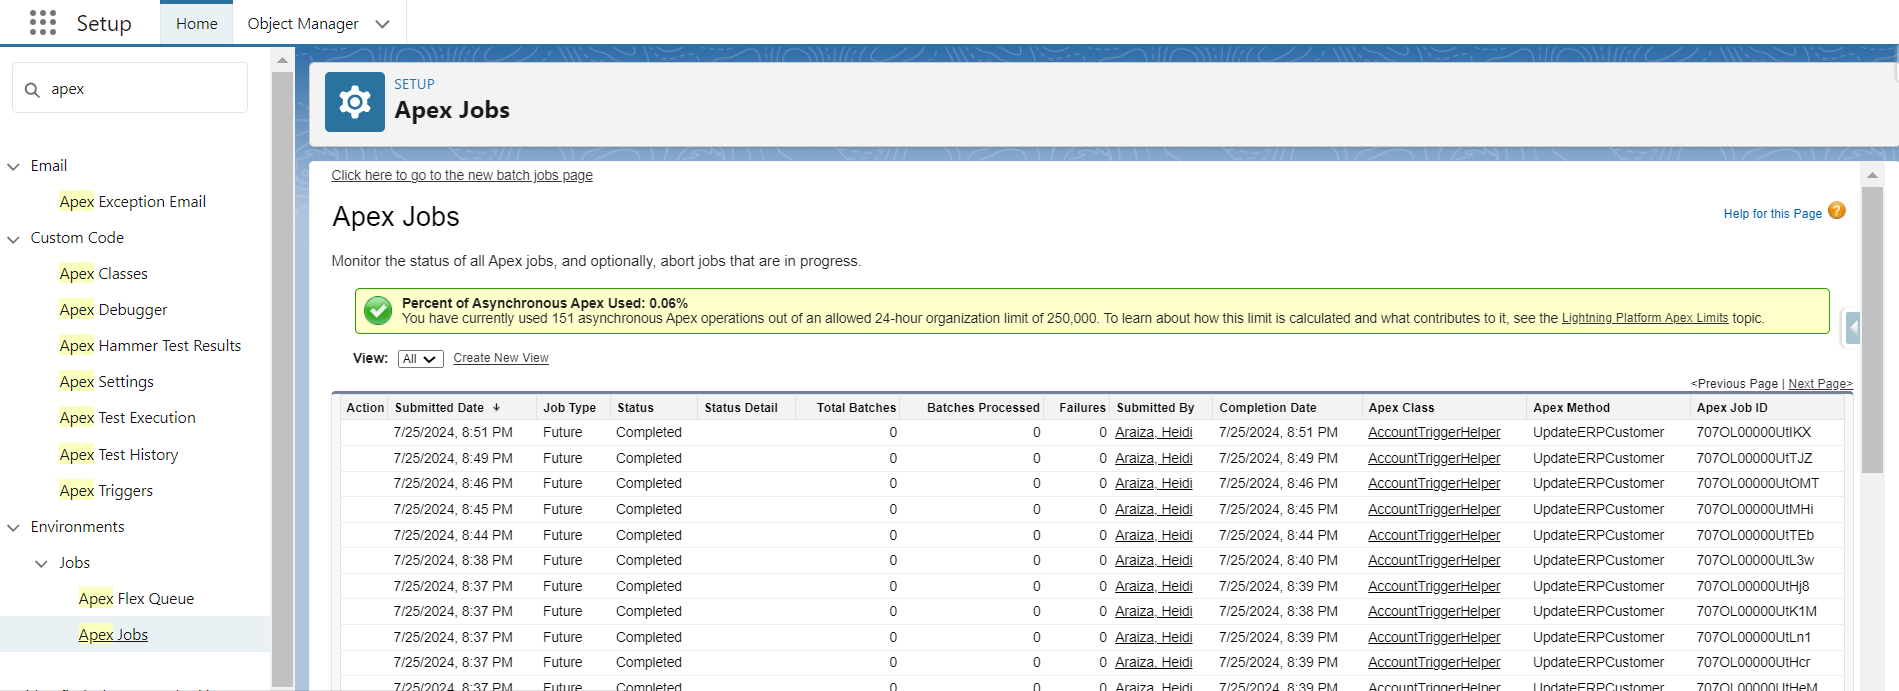
By following these detailed steps, you can effectively abort all existing background Apex Jobs in the Entity Mapping/Import module, ensuring smooth and efficient operations in Salesforce.
If you still have queries or any related problems, don’t hesitate to contact us at salesforce@greytrix.com. More details about our integration product are available on our website and Salesforce AppExchange.
We hope you may find this blog resourceful and helpful. However, if you still have concerns and need more help, please contact us at salesforce@greytrix.com.
About Us
Greytrix – a globally recognized and one of the oldest Sage Development Partner and a Salesforce Product development partner offers a wide variety of integration products and services to the end users as well as to the Partners and Sage PSG across the globe. We offer Consultation, Configuration, Training and support services in out-of-the-box functionality as well as customizations to incorporate custom business rules and functionalities that require apex code incorporation into the Salesforce platform.
Greytrix has some unique solutions for Cloud CRM such as Salesforce Sage integration for Sage X3, Sage 100 and Sage 300 (Sage Accpac). We also offer best-in-class Cloud CRM Salesforce customization and development services along with services such as Salesforce Data Migration, Integrated App development, Custom App development and Technical Support business partners and end users. Salesforce Cloud CRM integration offered by Greytrix works with Lightning web components and supports standard opportunity workflow. Greytrix GUMU™ integration for Sage ERP – Salesforce is a 5-star rated app listed on Salesforce AppExchange.
The GUMU™ Cloud framework by Greytrix forms the backbone of cloud integrations that are managed in real-time for processing and execution of application programs at the click of a button.
For more information on our Salesforce products and services, contact us at salesforce@greytrix.com. We will be glad to assist you.
Related Posts
- GUMU™ Features – Segregation based on Type of Import routine
- GUMU™ Salesforce Tricks and Tips – about creating Relationship between Entities Import Routine
- Salesforce Flows vs. Apex Triggers: Making the Right Choice for Your Business Needs
- How to invoke lightning Auto launched Flow from the Apex class
